Home Page › Express blogPage 2
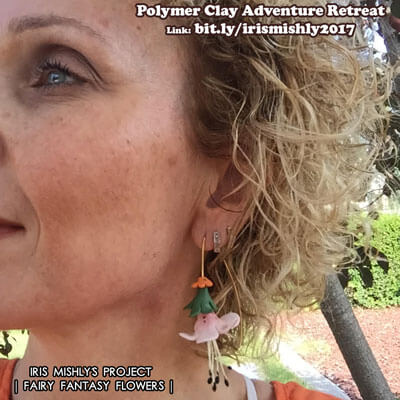
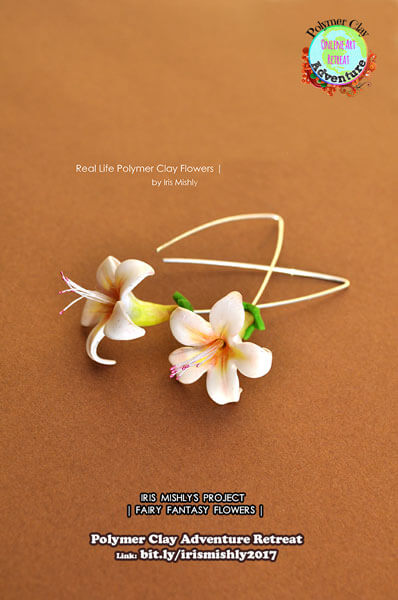
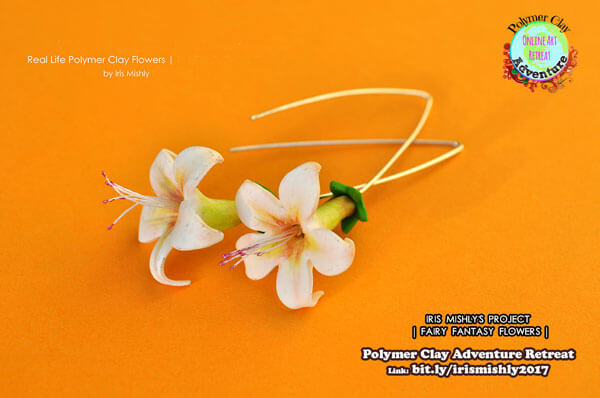
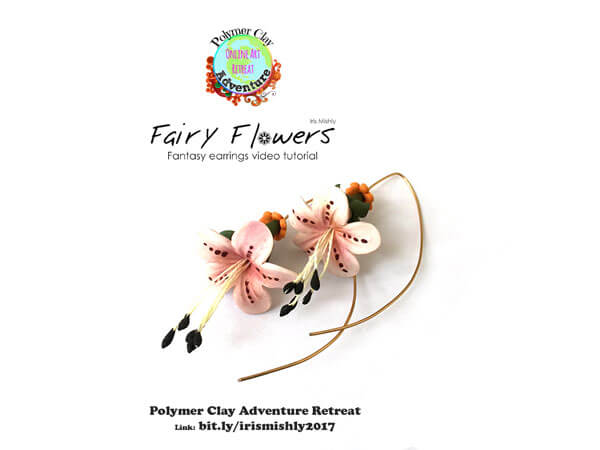
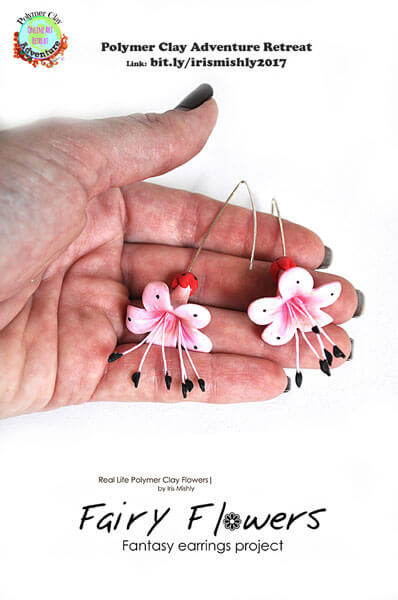
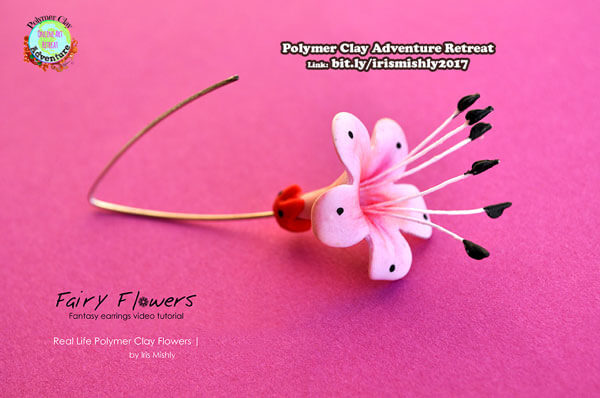
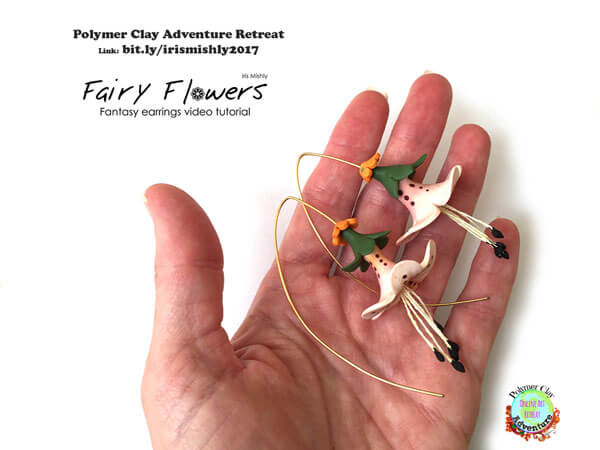
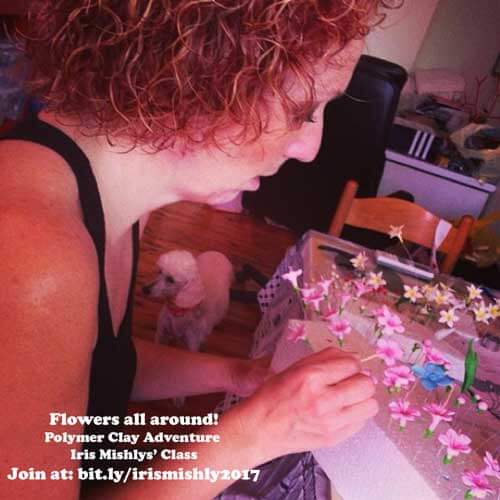
I am happy to announce that this year I will also be a part of Polymer Clay Adventure (PCA) retreat 2017 teachers crew :)
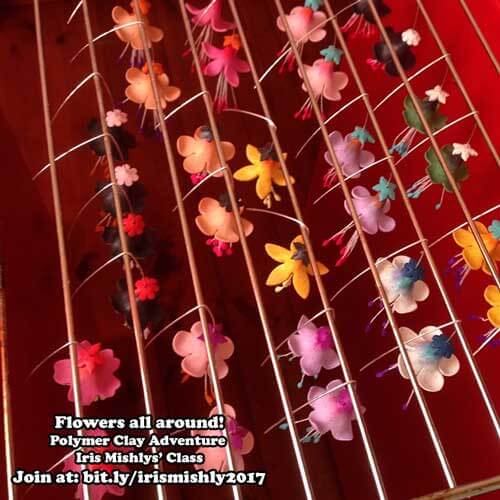
Polymer Clay Adventure (PCA in short) is a yearly online retreat hosting more than 24 international teachers offering a wonderful variety of polymer clay techniques – from flowers, to sculpturing, millefiori, texturing, surface techniques and many many more.
The classes are suitable for all levels from beginners to advanced. (Tell you a secret? after 10 years doing polymer even I learn something new every time I watch a fellow artist work!)
Each teacher is covering a final project offered in videos and PDF handout so you can take it with you to your studio.
Is it expensive? Well – not at all! The price for all classes is 99$ and you get ALL 24 of them! That’s only ~4$ per class! Where else can you get a full class in video & PDF for that low price?
Why should you sign up?
Well, because its a celebration of polymer clay art!
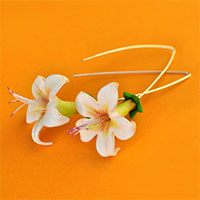
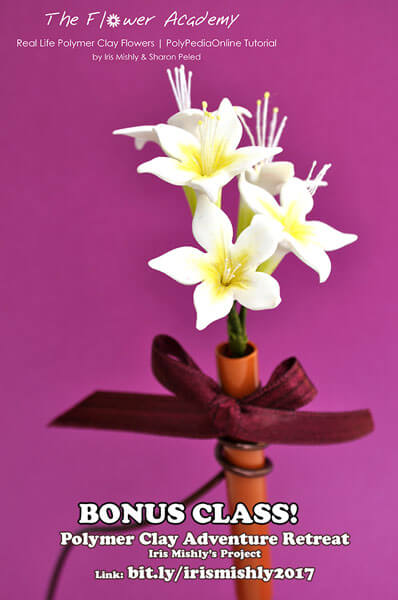
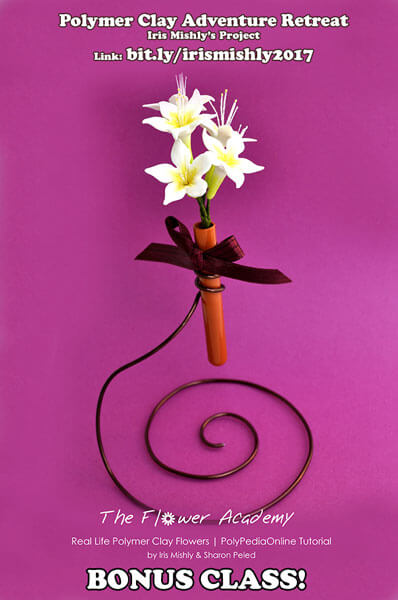
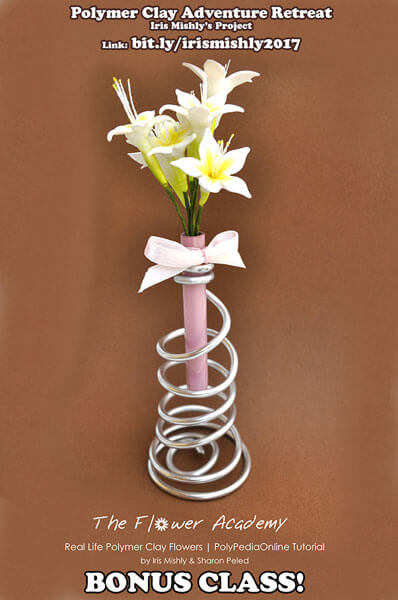
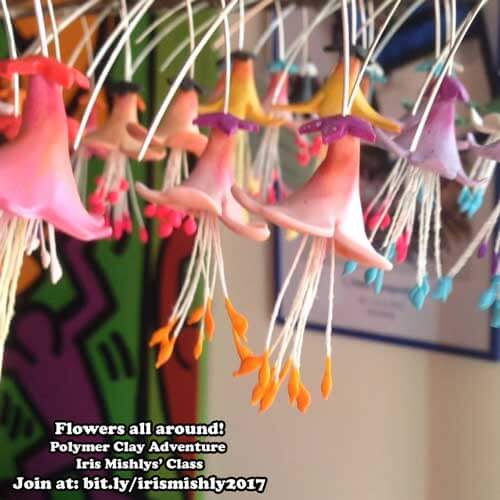
It’s an affordable, all-inclusive bunch of classes and activities designed to grow your skills and introduce you to new teachers, techniques, and friends around the world! You can also be added to a private Facebook group asking questions and sharing tips, tricks and information; It’s designed for people who love to create and want to surround themselves with polymer clay colleagues and friends without paying high fees or leaving family and work behind! On PCA you get to touch all subjects – Home decor, jewellery, sculptural and many more! You will also be able to directly contact the teachers and ask questions without having to figure it out yourself or being shy – we are a powerful community! You will have instant access to all classes from January 1st, 2017 so you can choose which project you start with. I’ll be teaching a a fun, whimsical flower earrings set which can be created in endless colours, textures, patterns to match every outfit, mood of style! You will learn how to create your own ear wire as an integral part of the earrings. Embellish your flowers with impression to mimic a natural flower and learn how to create your OWN impression tools. Learn how to use chalk pastels to give your flower realistic or fantasy colors. BONUS! Finally, Learn how to turn those flowers into a beautiful center piece held by test tube & wires.OOOO the GIFTS!!
2 Amazing Give-Aways!
==> You should know that there are a number of affiliate links you can sign up through. If you choose to sign up through my affiliate link, you’ll BOTH receive the FREE PRIZE PACK sent to your home AND be included in the MEGA-SUPER pack raffle.
1. The MEGA-SUPER pack is a $250 worth pampering kit for your flower creating. This set will be raffled between all students joining using my affiliate link. This kit includes –
A foampad surface; 2 Flower cutters – small & large A set of double sided ball tools; Artificial stamens perfect for polymer clay & baking in 6 different colours; An xacto knife; Texturing sheet; 8 Test tubes in two sizes – small & large A special low lint fabric for your cornstarch bag & rubber band Brush tips for texturing, detailing etc; PLUS… The FULL “Flower Academy” master class which include 26 life-like flowers classes!! ~~~~~~~~~~~~~~~~~
2. A FREE PRIZE PACK will be sent to ANYONE joining using my affiliate link in a mail package sent to your home! This pack includes – A self-adhesive pattern stencil; Square texture for your clay; A set of 6 double sided artificial stamens; A mesh texture $10 gift card to use in my tutorials shop!
FREE INTERNATIONAL shipping!
~~~~~~~~~~~~~~~~~
Here’s my affiliate link to sign up to the Polymer Clay Adventure 2017: https://bit.ly/irismishly-pca2017 #gallery-1 { margin: auto; } #gallery-1 .gallery-item { float: left; margin-top: 10px; text-align: center; width: 50%; } #gallery-1 img { border: 2px solid #cfcfcf; } #gallery-1 .gallery-caption { margin-left: 0; } /* see gallery_shortcode() in wp-includes/media.php */
 How to use transfers and patterns to create polymer clay beads – A short tutorial
Using transfers and patterns to create polymer clay beads is a very quick and rewarding process. I even risk myself and say it’s for the “lazy” ones amongst us (and I consider myself sometimes lazy too!)
It’s really 1-2-3 and you’re done – buy a pattern or draw your own, transfer it onto the clay and cut your bead. Sounds easy, right? oh yes.
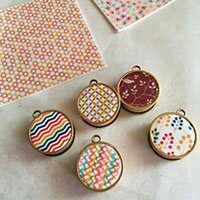
I got a chance to play with Becky from “Nunn Design” findings again, this time it’s bezels with an open hole – round and rectangle. The findings are available in several colours, I like to work with the “goldish” style simply because all my other findings (rings, ear wire etc) are gold plated.
Since I was in the mood of creating cabochons for my macrame art I took the same patterns and used them along with Becky’s metal findings.
I am sharing with you the short process of layering, cutting and assembling the clay beads inside the metal. There is not right and wrong, simply the way I do it :) If you do it differently I would be happy to hear more about it.
#gallery-2 { margin: auto; } #gallery-2 .gallery-item { float: left; margin-top: 10px; text-align: center; width: 50%; } #gallery-2 img { border: 2px solid #cfcfcf; } #gallery-2 .gallery-caption { margin-left: 0; } /* see gallery_shortcode() in wp-includes/media.php */ Start by preparing your patterned sheets. I chose to separate them into sections so it would be easier to handle. The sheets are quite thin (no. 4-5 in an Atlas pasta machine) Choose and measure your cutters according to the opening/hole of the finding. Lucky for me I found an almost exact cutter to match the opening of the metal circle. Layer your sheets. I am using purple on the back (visible) side and scrap clay on the inside (un-visible) side. Top layer would be the pattern sheet Place your transfer/pattern sheet, position the cutter Cut all the way through the layers. My bead was quite thick due to the height of the metal finding. I wanted it to fill nicely the circle so I used a medium setting on the bottom (purple), thickest folded in half (scrap, 2 laters), and then top pattern layer (thin sheet) The is the cut out bead Carefully insert it onto the metal finding. You may need to take it out after baking and reinforce with glue on the “walls” of the metal Press to secure the bead inside the findings and to fill the space completely Ready made beads You can texture the back side using a coarse sanding paper All beads from front side I’ve added a stamp on the back side with my name on it (optional) I’ve tried adding a strip of pattern onto the outer border of the metal findings but eventually I didn’t like it and took it off. Same process to create a matching earring set – placing the patten on a sheet of clay Inserting into the metal findings Pressing to fill the space completly Flip to add texture (and stamp) Here is a set ready for baking.Bake according to manufacture instructions.
Once the beads are baked and cooled, I added clear resin on top to give them a nice shine and as a protective later.
Here are additional beads made with the patterns, this is too much fun, can’t stop!
Have fun! :)
Iris.
“Resin-ing” | Adding 2 parts epoxy resin on image transfer polymer clay beads from PolyPediaOnline by Iris Mishly on Vimeo.
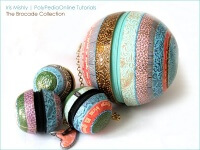
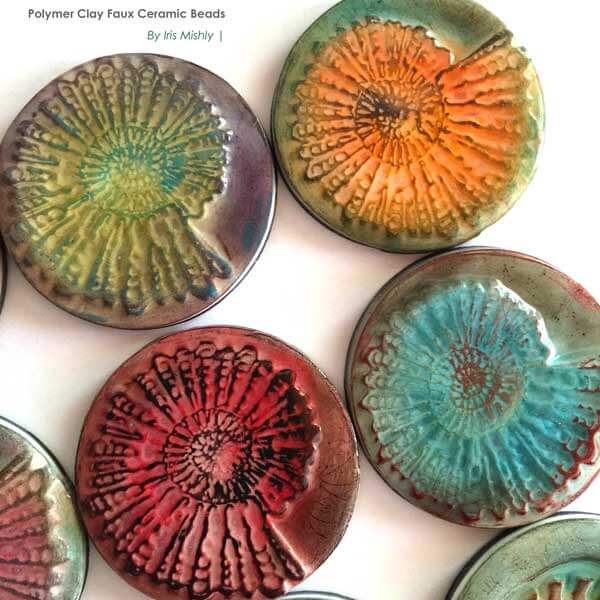
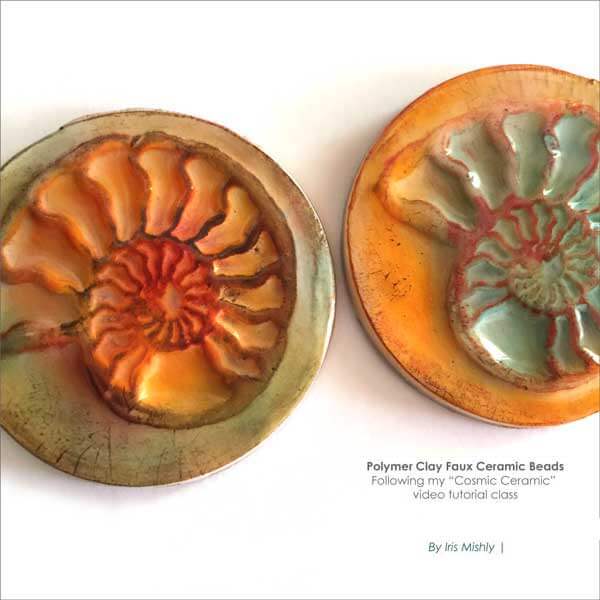
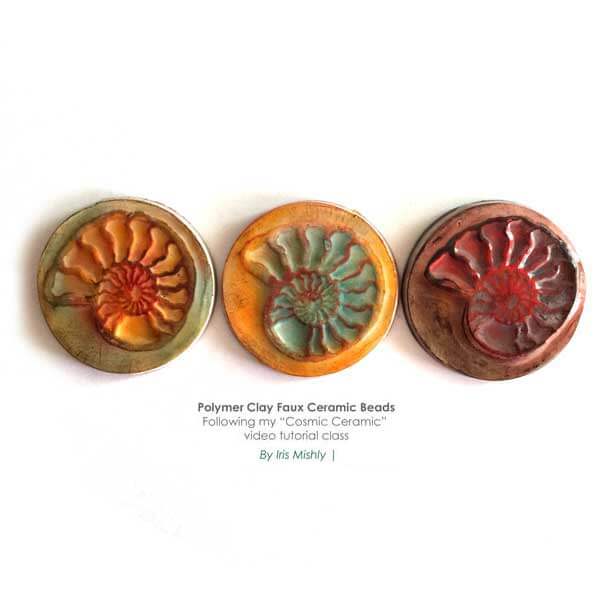
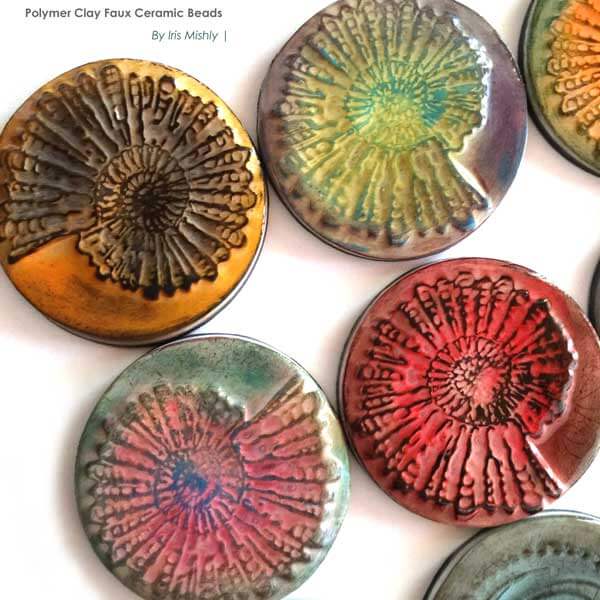
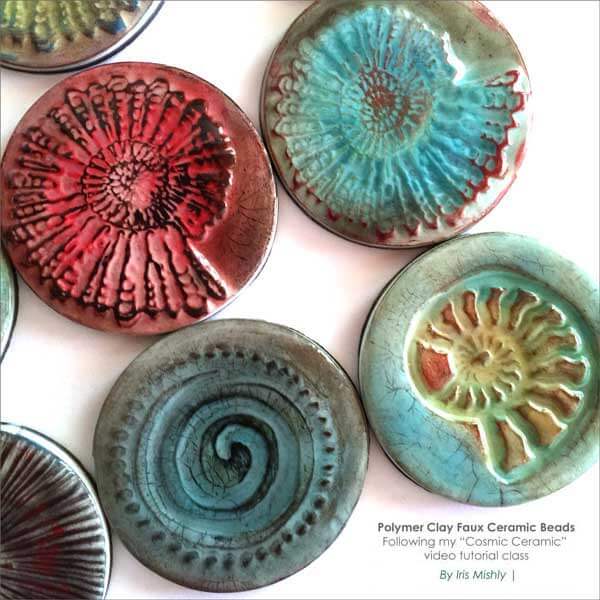
Fossils & Ammonites | Creating Focal Polymer Clay Beads
Ammonites first appeared about 240 million years ago and were predatory, squid-like creatures that lived inside coil-shaped shells.
Did you know that a group of ammonites was called a “school” (just like fish) and that female ammonites grew up to 400% larger than males? (probably to make room to lay eggs)…
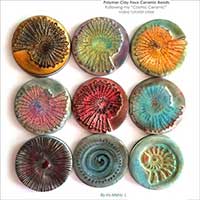
Although they went extinct with the dinosaurs 65 million years ago we can still enjoy their beautiful shape and form in our focal polymer clay beads thanks to stamps, chalk pastels, transfers and other fun techniques!
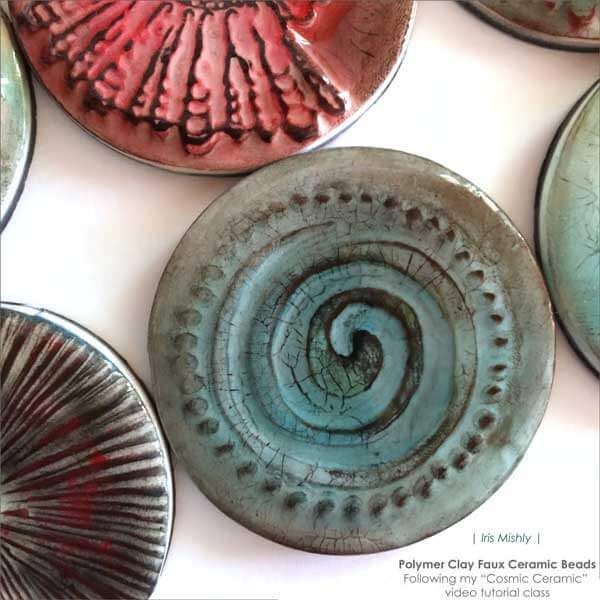
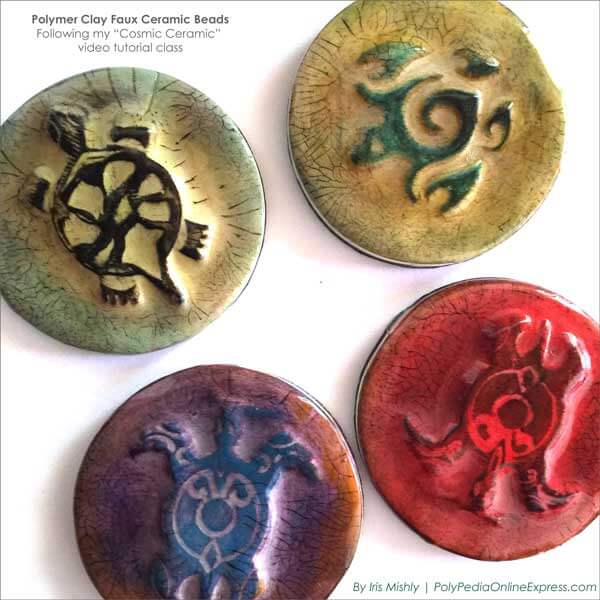
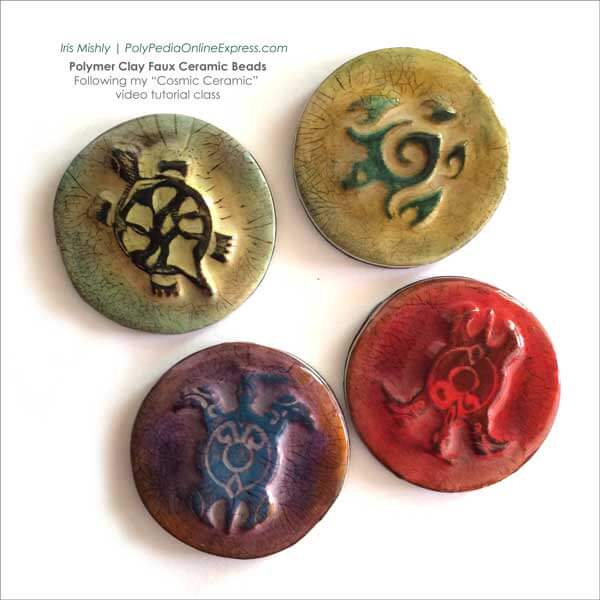
In my recent studio time I played with Tonja’s Treasures stamps along with my “Cosmic Ceramic – Round About” beads class. They are a perfect match!
The focal beads were created in various sizes to match my future polymer-macrame jewellery. Most of them were round (which is the easiest shape to wrap with cords) and were decorated with chalk pastels and clear resin as a top shiny coat (The full technique is well explained in the PDF and video tutorial).
Want to give it a try? You can use any stamp you have! Yes! https://www.polypediaonlineexpress.com/product/cosmic-ceramic-polymer-clay-tutorial-faux-ceramic-round-about-beads-ceramic-blossom-let-the-thousand-flowers-beads-ebookvideos/
Here is a link to my “INKredible Macrame” series in case you want to get your hands in macrame knotting – Only several knots and you master the whole idea! https://www.polypediaonlineexpress.com/product-category/technique/micro-macrame-pattern/
==> A pampering “Cosmic Ceramic” kit will be sent to students ordering the complete set! https://www.polypediaonlineexpress.com/product/the-complete-cosmic-ceramic-18-projects-polymer-clay-tutorial-ebookvideos/
********* PLUS a special 20% OFF is offered on ALL PolyPediaOnline Tutorials until August 25th (no need to type a coupon, price will be reduced after added to cart)
Have fun!
#gallery-3 { margin: auto; } #gallery-3 .gallery-item { float: left; margin-top: 10px; text-align: center; width: 50%; } #gallery-3 img { border: 2px solid #cfcfcf; } #gallery-3 .gallery-caption { margin-left: 0; } /* see gallery_shortcode() in wp-includes/media.php */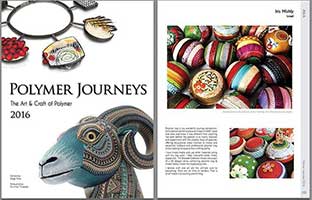
DRAWING IS CLOSED – WINNER WAS ANNOUNCED August 25th 2016, on FACEBOOK – Ana Belen! Congratulations!
Thank you all!
======================
The Art & craft of polymer clay is a relatively a new one but its speedy “meteoric” development is astonishing.
Who would ever thought that polymer clay, originally made for children application, would rise during the recent decades and become what it is today?
In her recent book “Polymer Journey”, Sage Bray, editor of “The Polymer Arts” magazine is showcasing recent work created by 108 artists from around the world (I’m there too! ;) The book is filled with beautiful, elegant, delicate and original artwork from all over the globe; This collection offers a wide view on the “new world” of polymer clay.
I was proud to be selected as one of the curators of this book, allowing me to browse all submissions. It was a hard decision!
Since I got 2 copies (and I don’t need two of them…) I am giving YOU one of them!
—————– Want to be included in the raffle? —————– 2 options – 1. Add a comment to this blog post down below with your full name and email so I’ll know how to contact you if you win.
OR
2. Order any of my classes and your name will be entered 3 TIMES into the basket! https://www.polypediaonlineexpress.com/shop/
Winner will be announced in my next “PolyPediaOnline Connected” email and on Facebook on August 25th,
Thank you :)
Iris
Every year at about this time, parents deal with THE challenge – Summer vacation :)
This is the time to “re-invent ourselves” thinking how can be keep our children happy (and busy!) while they are away from school.
Traveling locally or out of the country, outdoor activities, going to the beach, BUT! How about staying in the cool air condition and play with clay for a full week?
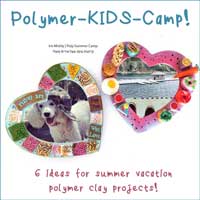
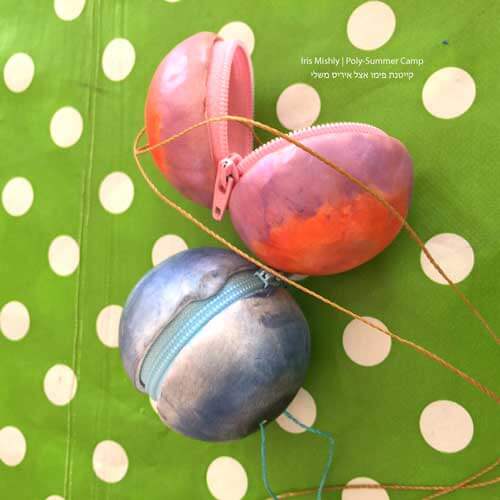
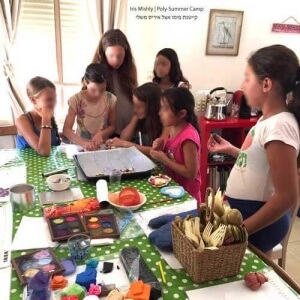
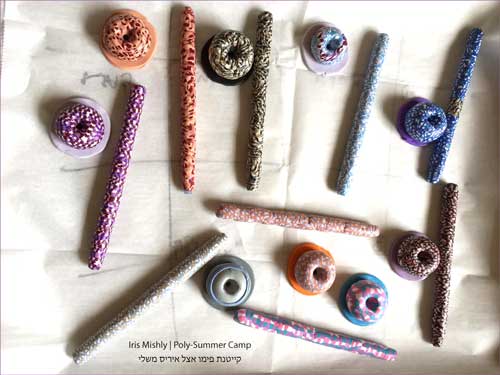
A Polymer Kids Camp! This past week was dedicated to the younger generation in my city – A “poly-summer camp” with enthusiastic ladies and one 12 yrs boy (yes! rare but happened! ;)
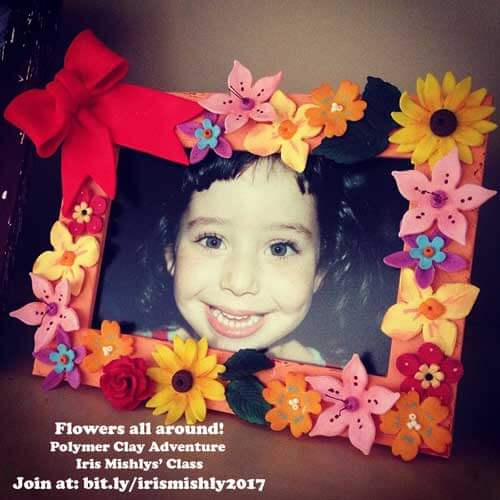
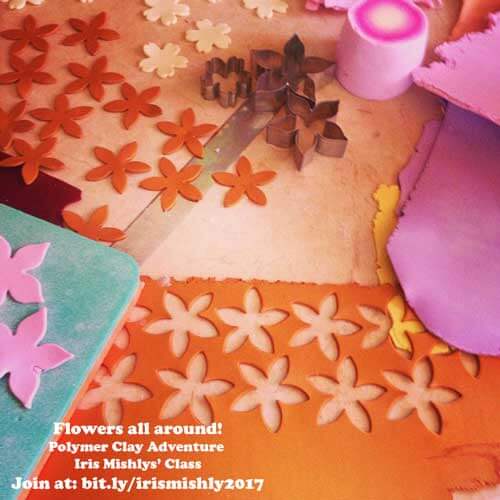
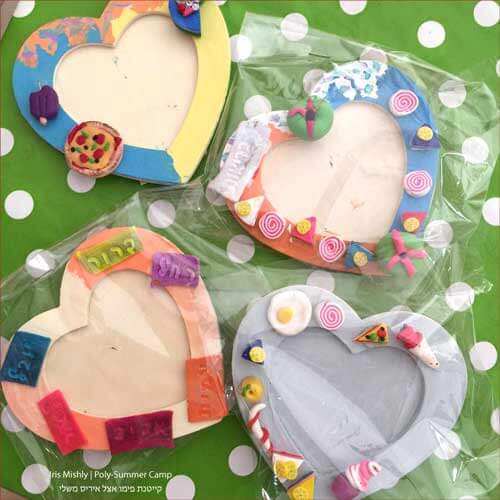
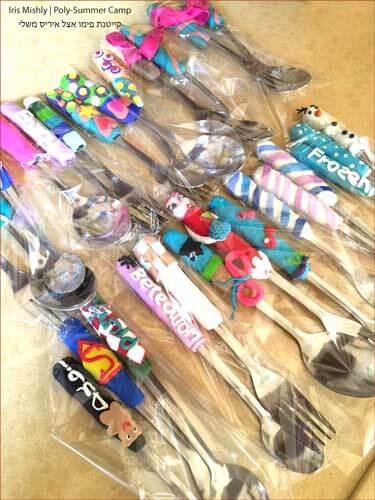
Projects ranged from decorating photo frames with miniature food, playing with textures, stamps, stencils, creating a mobile hanger, making a decorated utensil set, covering a pen with millefiori canes and even building a “brocade collection” zippered purse! Pure fun!
So I prepared my home accordingly, covered the table with a VERY thick table cloth, placed 2 pasta machines to the service and off we go!
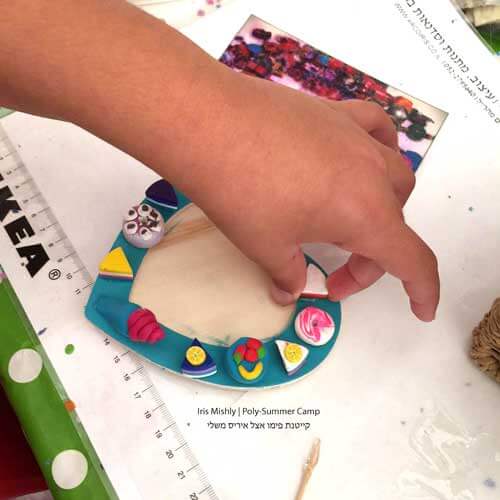
Wait… Several tips about working with children – 1. It’s always a good idea to have ready made samples for a visual proof of the project you are about to teach. Children doesn’t always visualise what would be the end result of a 2 hours session and can’t see what you are seeing in your mind. Always make one of two samples of the offered project, play with colours, techniques and show the variations of each idea you are offering to sparkle their imagination (which brings me to the 2nd tip).
2. Creativity is a wonderful thing but consider the amount of time and children around your craft table. It’s easier to give the same instructions to 10 children and almost impossible to give 10 different instructions to 10 different children doing 10 separate projects and stay in time frame. If you want to encourage creativity and “do what you wish” approach that is fine as long as you realise that may take longer than expected (or with “quick” artists – some will stay “out of work” if they complete their project ahead of time). I tend to give one or two options. They can always get some clay and experiment more at home.
3. Floor. Your floor with be filled with clay bits after each workshop. You can either place some kind of protecting surface (vinyl, plastic cover taped all around) or simply acknowledge the fact that you’ll need to slowly clean all the dots and leftovers sticking to the surface once everyone is home. It’s not such a big deal but it’s work :) You can leave 10 minutes at the end of the class and ask the children help – it’s only reasonable that each person clean after him when he is finished.
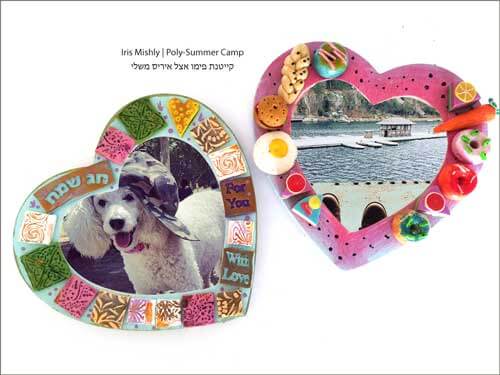
Ready to see fun polymer clay ideas to do with children this summer?1. Photo frames – These simple wooden frames were purchased in a craft store. I chose wood because I wanted to paint it in colourful acrylic paints and bake them in the oven along with the clay. If you prefer to use a plastic frame and bake your clay separately – that’s a good option too. I think IKEA has nice non-expensive plastic photo frames. The heart shaped photo frames were decorated with basic miniature food (cakes, bagels, cupcakes, egg, candy) and a 2nd frame was decorated with stamped squares baked along with the frames. After cooling down all items were glued to secure them in place.
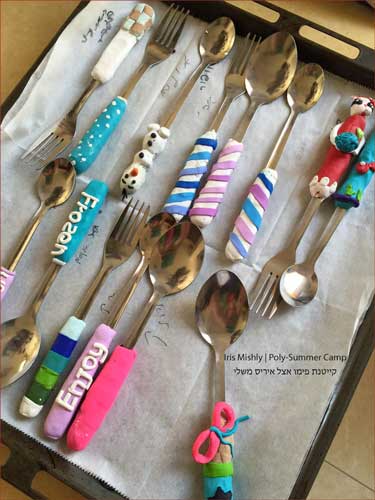
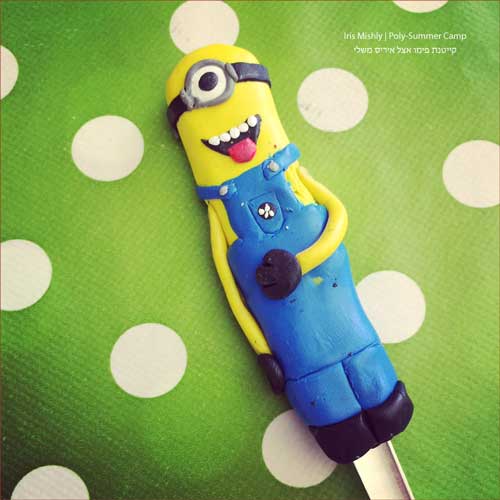
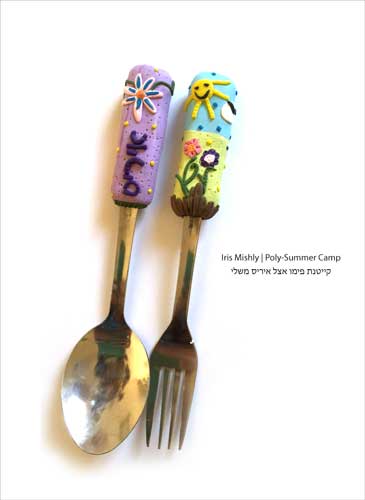
2. Covering utensils – I chose metal items to be able to bake them in the oven but wooden utensils would work as well. Make sure the children know they can’t place these beauties in the dish washer or… Only manually washing. Pinterest is an amazing source of inspiration looking for ideas to cover forks, spoons and tea spoons with polymer clay. Once of my students made a minion out of it!
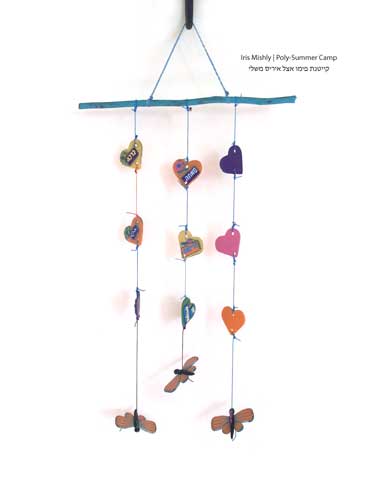
3. Mobile hangers – This project is a fun opportunity to hang little clay objects using threads and tree branches. It can be a carefully planned project or leftover beads from all other projects you made with the children. I chose to use cookie cutters and stamps and then thread all items on a coloured tree branch taken from my garden. The branch was painted with acrylic paint as well. The millefiori butterflies can either be taught during class or demonstrated by yourself and divided between the participants (what I did). Don’t forget to pierce the items before baking or you’ll have a million items to drill manually! :)
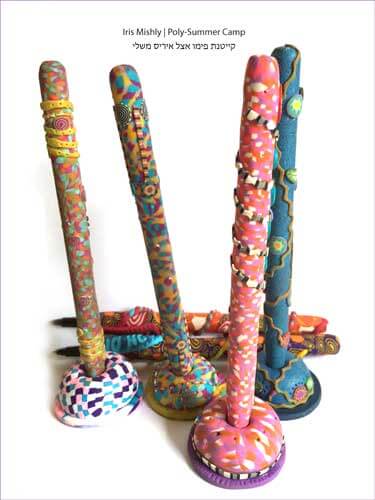
4. Covering pens – This project was my opportunity to teach the children a bit about millefiori and canning. We made a mosaic cane and then covered our pen and holder. I use the sushi analogy to explain the slices and identical pattern – it turns out kids love sushi! ;) Make sure you use oven proof pens, secured to place in the oven. I use BIC pens and take out the ink before inserting into the oven. I don’t know if BIC can hold in high temp (such as Kato clay requires but make sure you try ahead of time). After the pen is cool I insert the ink back.
5. Creating round purses – This project was always something I wanted to try with children and see if it was too complicated or not (it’s not :). Since the process involve multiple baking I chose a simple version of my “Brocade Collection” and used powders. If you want to learn about advanced options for this design you are welcome to check out my class and kit – “Brocade Collection” tutorial.
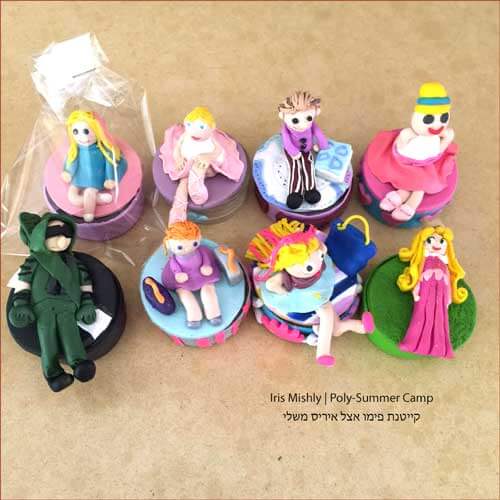
6. Sculpturing – Polymer clay is the perfect medium to sculpt figurines. In this project we chose to create a small princess (or “Arrow Guy”) figurine and place it as a cover for a small glass candle holder. A sweet souvenir to save small jewellery, candy, change or even sweetener tablets!
There are many additional projects you can created with kids – keychains, bookmarks, buttons, brooches, hair accessories, there is really no limits to the number of ideas, as long as we keep it simple and clear to the future young generation of artists!
Good luck and have a great (cool) summer!
Iris Mishly :)
#gallery-4 { margin: auto; } #gallery-4 .gallery-item { float: left; margin-top: 10px; text-align: center; width: 33%; } #gallery-4 img { border: 2px solid #cfcfcf; } #gallery-4 .gallery-caption { margin-left: 0; } /* see gallery_shortcode() in wp-includes/media.php */
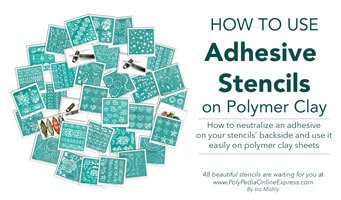 12 NEW self-adhesive stencils – Perfect for polymer clay!
Transform your polymer clay sheets into colourful, beautiful printed sheets with 48 different patterns – Tribal designs, elephants, 3 different mandalas, lotus flowers, dream catchers, hamsa, geometric patterns, star of david, dove, small butterflies, arrows, frames, hearts, butterflies, geometric, feathers, dots, stars and circles, leaves, doily, borders and many many more!
SPECIAL SALE! 15% OFF ALL stencils Until June 10th 2016!
–> Click on link below to choose your stencils! SPECIAL SALE! 4 DAYS – 15% OFF ALL stencils! –> Click on link below to choose your stencils! https://www.polypediaonlineexpress.com/product-category/tools/stencils/
FREE Worldwide SHIPPING! NO extra costs!
The stencils are long and narrow (4.5 on 8 inch / 11.5 on 20.5 cm) offering several patterns in a single stencil!
They are self-adhesive and will work perfectly on your polymer clay and other projects. The stencils are compatible with acrylic paints, chalk inks, chalk pastels, powders etc.
Here is a video demonstrating how to “neutralize” the adhesive back –
Samples made with these stencils (taken from the “INKredible 2” class)
Don’t miss the special offer –
15% OFF ALL stencils Until June 10th 2016!
–> Click on link below to choose your stencils! SPECIAL SALE! 4 DAYS – 15% OFF ALL stencils! –> Click on link below to choose your stencils! https://www.polypediaonlineexpress.com/product-category/tools/stencils/ FREE Worldwide SHIPPING! NO extra costs! NOTE – No need to type a coupon – Price will be reduced after added to cart.
FREE Worldwide SHIPPING! NO extra costs!
**** NOTE – No need to type a coupon, price will be reduced after added to cart
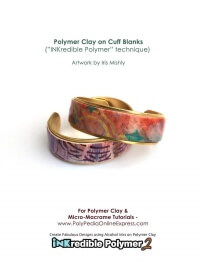
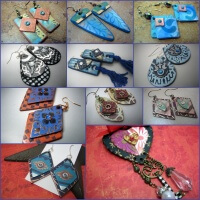
When becky from “Nunn Design” offered me to play with her findings and add polymer clay and micro macrame I couldn’t say no :)
Becky is the fairy of findings. She has a unique collection of beautiful products called “Elements of Inspiration®” creating wearable art and elegant jewelry. Bezels, shanks, pendants, glass, earrings, rings, bracelets, pewter, gold plated, silver plated and so much more – Anything for your art, style and colour.
So I headed to her catalog and chose findings to create with. Hard choices! So many great stuff there! but I was having polymer clay in my mind and how to use it along with her findings: clay sheets covering metal channels or combined together inside loops, tubes, circles and earrings. I couldn’t stop at polymer alone so I’ve tried it with macrame knotting as well. Haaaa! what a joy! The final result is so stylish and elegant! A complete upgrade of your regular findings!
Polymer clay & alcohol inks sheets – Free Polymer Clay TutorialMy first on the list were the cuffs and earrings, I made a polymer clay sheet decorated with inks and goodies. The technique used here was a part of my “INKredible Polymer 2” class using various materials on clay and adding alcohol inks
First step was to prepare the sheets with colours and patterns. The sheets were rolled medium-thin in the pasta machine to fit the cuff channel blank (see on top of the photo). I used a piece of paper as a template to measure the exact size I’ll need for the metal blank. I have used my beloved stencils for both sheets – the “Doily” stencil pattern and the “Infinite Stars” pattern. (as for all the other secrets ingredients you’ll have to own the class to know ;) Second step was to decide where to place the template (hard decision!! LOL), I think I changed my mind a hundred times :) Placing and cutting. Liquid polymer clay was used to adhere the raw polymer clay sheet onto the metal blank, this will assure a good bondage of both layers together after baking is complete. Make sure you work on the rounded edges to fit your design. You want the cuff to slide onto your wrist without scratching your skin. Remember to fix the cuff size BEFORE baking. Polymer clay is not flexible after baking and if you change the size of the blank after the clay is baked you may crack or break your pattern. Ready to bake! I’ve added a pair of earrings to go with it by simply cutting a circle smaller than my metal loops. If you want to embed the clay inside the circle, either use an x-acto knife and cut around the inside of the blank or look for a circle cutter fit the diameter of the loop. I didn’t have such a cutter so I made them smaller. They dangled nicely on my ear. Clear resin was placed on top of all my beads to protect the pattern from rubbing off in time. Using clear resin on curved shapes is tricky so I used very little amount of it, making a thin thin layer. If you prefer to use a spray (PYM spray or other varnish), choose your preferred sealer. #gallery-5 { margin: auto; } #gallery-5 .gallery-item { float: left; margin-top: 10px; text-align: center; width: 50%; } #gallery-5 img { border: 2px solid #cfcfcf; } #gallery-5 .gallery-caption { margin-left: 0; } /* see gallery_shortcode() in wp-includes/media.php */~~~~~~~~~~~~~~~~~~~~~~~~~~~~~~~~
Want to see what I made with Becky’s Tube beads & a simple micro macrame pattern?Micro macrame can be knotted into many shapes, sizes, widths and lengths. I chose to use channeled beads and fill them with knots. I could fill them with polymer clay but for these findings I wanted a different look. The knots used here are called “Cavandoli” knotting. This kind of knotting creates a tapestry design, a geometric pattern and is very common to create special visuals such as letters, pixel drawings etc. I’m sure some of you did it when you were children making friendship bracelets. :)
The cavandoli knotting is based on the Vertical Double Half Hitch knot (VDHH) and can be created freely or with a planned pattern. (If are not familiar with macrame knots, you are welcome to check out my “INKredible Macrame” 29 classes set divided into B.A, M.A & Ph.D levels which include basics and comprehensive video patterns.)
In the tube beads I used leftovers of cords from other projects and created lines of knots. Leftovers are perfect for this type of knotting. I’m using Brazilian “Linhasita” 0.8 mm wax coated cord and created a main holding cord with cords hanging on it (using the larks head knot). The number of cords depends on your cord thickness and the size of the bead channel. I placed 11 cords (folded in half = 22 cord) and knotted for 8 rows (counting the first top mounting row as the first one).
After completing the design (whether planned or spontaneous) I made sure I have 2 sets of cords to secure the sheet onto the metal tube bead (like a small carpet wrapped and knotted around a log).
This means I left 2 sets of cords longer from the sides to be able to tie them after completing the row knotting. If you want to have more knots – leave longer cords on the edges, (next time I would leave 3 sets – one from the top, one on the bottom and one in the middle to get a tighter closure)
Here is a very short knotting video showing the movements of the cords and hands (no sound) –
That’s it!
A gallery of the final pieces – Aren’t they beautiful?
#gallery-6 { margin: auto; } #gallery-6 .gallery-item { float: left; margin-top: 10px; text-align: center; width: 50%; } #gallery-6 img { border: 2px solid #cfcfcf; } #gallery-6 .gallery-caption { margin-left: 0; } /* see gallery_shortcode() in wp-includes/media.php */~~~~ DON’T MISS!! ~~~~~ A special offer available for “Nunn Design” subscribers – Use coupon code “nunn” on checkout and you will get an EXTRA 15% discount on all tutorials including the “INKredible Polymer” series and the “INKredible Macrame” series!
You can order them separately (each project individually) or as a set with kit, CD and goodies!
Thank you! :) Iris Mishly
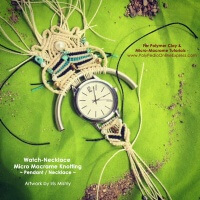
Have you ever thought of combining polymer clay, a hand watch and micro macrame cords?
In the early days we used to wear a watch to know the time. Now we have our phones…
In my recent designs I was looking for original ways to play with knotted designs and one of the ideas popped in my head was a “watch-necklace”; Something large, bold and pretty. I started a quest looking (and “borrowing”…) friends and family vintage “drawers-stored” old hand watches and use them as a part of a long necklace design. The final result is an impressive, unusual knotted jewel especially when upgrading the look with polymer clay beads!
Make them long, short, make them large or small, add an earring set – Everything goes!
Micro macrame knots and waxed cords are used to connect both pieces together while using the watch side bars (metal tubes connecting the straps) as connecting points to the different elements and cording.
Some of them had slightly different connection on the back side so I had to play with the cords until I found the trick. It’s not perfect yet but I’ve learned a lot by trial & error! I’m sure the next one would be better!
Here is another batch of my recent polymer-macrame-pendants right out of the oven;
—————- In these designs I am using beads with the “INKredible Polymer 2” technique using various materials over polymer clay sheets combined with alcohol inks.
The “INKredible Polymer 2” class is now offered for a special 20%OFF sale until May 16th 2016;, No need to type a coupon, price will be reduced after added to cart! Don’t miss it! https://www.polypediaonlineexpress.com/product/complete-inkredible-2-alcohol-inks-polymer-clay-tutorials-ebookvideoscd/
Ready to add cords to your beads? All micro macrame patterns are also on sale here – https://www.polypediaonlineexpress.com/product-category/technique/micro-macrame-pattern/
—————-
Now go search your drawers! You may find a treasure hidden there! ?
Have you ever wanted to create quick patterns using stencils? Lupe Meter, one of my students, took my stencils freebie and made a whole new parade of beads! Aren’t they fabulous?
Stencils are the “low cost” version of silk screens. You can use them with paints, chalks, sprays, inks; You can use brushes, sponges or even your fingers! Their holes/patterns are large enough so they will not get clogged or blocked with paint, they can easily be cleaned with baby wipe or water and some of them have an adhesive back so you can also use them on other surfaces such as paper, metal, glass, ceramic, wood and polymer of course!
When I use stencils, I personally prefer to neutralise their adhesive back using cornstarch. This way I can handle their positioning easily and lift and re-arrange them on my clay sheet if necessary.
To neutralise the adhesive back I use a small fabric bag filled with cornstarch and punch the stickiness away. you can use an old sock with no 2nd partner or a disposable fabric wrapped in a rubber band as the cornstarch holder. The cornstarch prevents the stencil from sticking to the clay. This usually works for 4-5 uses and after that I repeat the “corn starching”.
I use my stencils in many of my classes including the INKredible 2 & the Cosmic Ceramic “Time for Tea” & “Xiang Incense sticks” class.
Here is a free video to learn how to use stencils on polymer clay as faux silk screen sheets creating beautiful fabric patterns – In this express tutorial we will create funky cool and colorful earrings using stencils as patterns, chalks or soft pastels and embossing powder to mix in our clay.
For the projects we will need — * Embossing powders in all kind of colors, textures or patterns; * Stencils; * Cutters (earring shapes); * Soft pastels / chalks;
► How to create quick and easy silk screen patterns using stencils – polymer clay earring project
=========> Don’t miss! STENCILS Special!
ALL STENCILS are now offered in a 15% off discount! & FREE shipping!
https://www.polypediaonlineexpress.com/product-category/tools/stencils/
NOTE – No need to type a coupon – Price will be reduced after added to cart,
Offer expires April 24th midnight!
https://www.polypediaonlineexpress.com/product-category/tools/stencils/
* – * – * – * – * – * – * – * – * – * – * – * – * – * – * Have fun and enjoy!
~ INSPIRATION ~
It’s amazing to see how artists work in different crafts.
Victoria Ellis is working with earthen clay. She uses a technique called bas relief which means carving or sculpture in which the figures are raised a few inches from a flat background to give a three-dimensional effect. Soon after her design is drawn onto a paper, she starts to transfer it into the clay with a pen – tracing the image. She uses a fountain pen and then the design is transfered directly to the clay as a print.
She uses cutting tools to slowly remove & carve out the lowest areas, but always careful not to break the surface as it is not very thick. It’s fascinating to see how well Victoria masters the process and technique. She uses a variety of tools, dentists tools, wooden tools – so similar to our polymer clay world.
Bas relief is a technique definitely will work with polymer clay, a beautiful inspiration.
Enjoy!
~ STUDENTS SPOTLIGHT! ~
Sonia Pinho from Portugal sent me a photo of her recent creation following my purses tutorial.
She says it all started as a game, creating a purse both from polymer clay and a braided string instead of a purse made completely with clay. The base form was made with clay, then covered with strings (using quite a lot of glue according to her) but the result is fresh and so original! The rest of the process was made following my “Brocade” collection purse tutorial – adding zipper and inner padding.
What is your idea to cover a polymer clay base purse? fabric? beads? dry pasta? clay flowers? That’s the fun about mix media! You can use so many materials!
———–
Enjoy a special Easter discount – ALL “Brocade Collection” tutorials are on sale – 25% OFF! PDF only, or a complete kit! NOTE – No need to type a coupon – price will be reduced after adding to cart.
Offer expires March 29th 2016 midnight. CLICK ON LINKS BELOW to order your own purse kit – Special goodies are included when ordering the complete set! https://www.polypediaonlineexpress.com/product/the-complete-polymer-clay-brocade-collection-zippered-purses-tutorial-ebookvideoscdkit/ ———–
Happy Easter!


