When becky from “Nunn Design” offered me to play with her findings and add polymer clay and micro macrame I couldn’t say no :)
Becky is the fairy of findings. She has a unique collection of beautiful products called “Elements of Inspiration®” creating wearable art and elegant jewelry.
Bezels, shanks, pendants, glass, earrings, rings, bracelets, pewter, gold plated, silver plated and so much more – Anything for your art, style and colour.
So I headed to her catalog and chose findings to create with.
Hard choices!
So many great stuff there! but I was having polymer clay in my mind and how to use it along with her findings: clay sheets covering metal channels or combined together inside loops, tubes, circles and earrings.
I couldn’t stop at polymer alone so I’ve tried it with macrame knotting as well. Haaaa! what a joy!
The final result is so stylish and elegant! A complete upgrade of your regular findings!
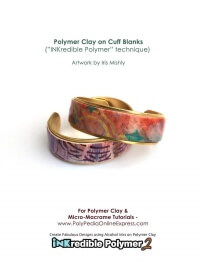
Polymer clay & alcohol inks sheets – Free Polymer Clay Tutorial
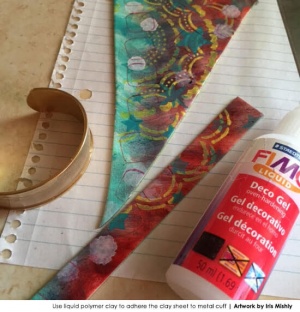
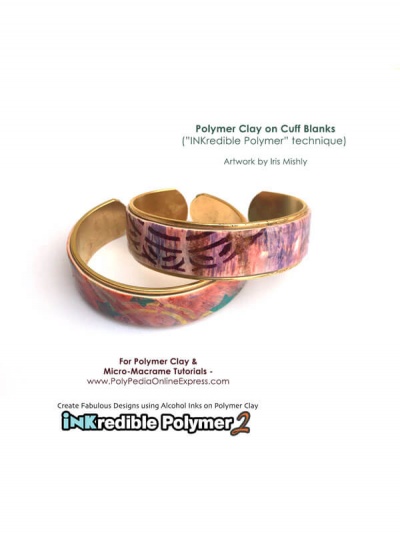
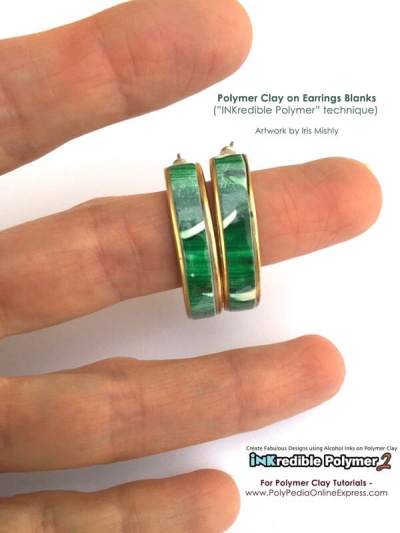
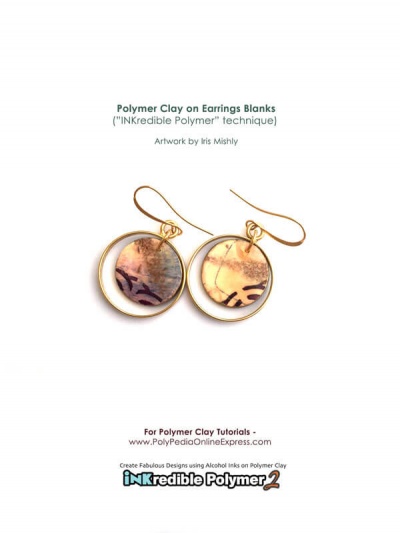
My first on the list were the cuffs and earrings, I made a polymer clay sheet decorated with inks and goodies.
The technique used here was a part of my “INKredible Polymer 2” class using various materials on clay and adding alcohol inks
- First step was to prepare the sheets with colours and patterns.
The sheets were rolled medium-thin in the pasta machine to fit the cuff channel blank (see on top of the photo).
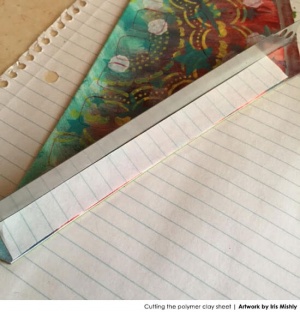
I used a piece of paper as a template to measure the exact size I’ll need for the metal blank.
I have used my beloved stencils for both sheets – the “Doily” stencil pattern and the “Infinite Stars” pattern. (as for all the other secrets ingredients you’ll have to own the class to know ;)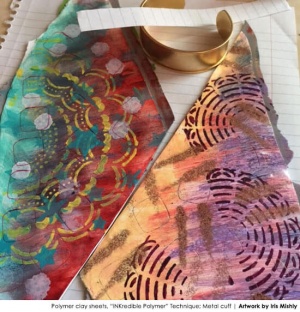
- Second step was to decide where to place the template (hard decision!! LOL), I think I changed my mind a hundred times :)
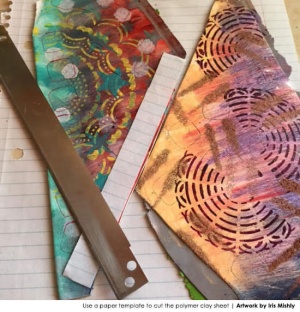
- Placing and cutting.
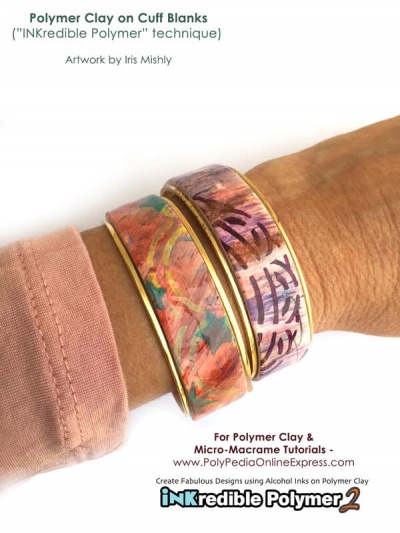
- Liquid polymer clay was used to adhere the raw polymer clay sheet onto the metal blank, this will assure a good bondage of both layers together after baking is complete.
Make sure you work on the rounded edges to fit your design. You want the cuff to slide onto your wrist without scratching your skin.
Remember to fix the cuff size BEFORE baking. Polymer clay is not flexible after baking and if you change the size of the blank after the clay is baked you may crack or break your pattern.
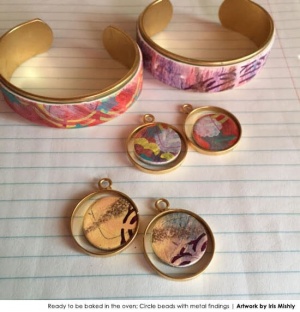
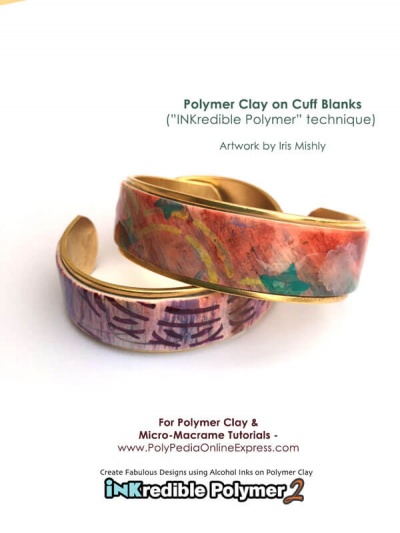
- Ready to bake!
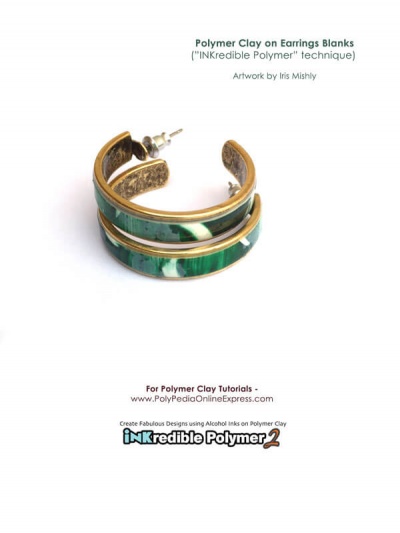
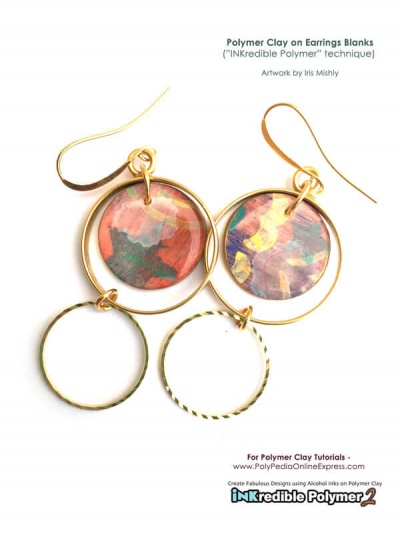
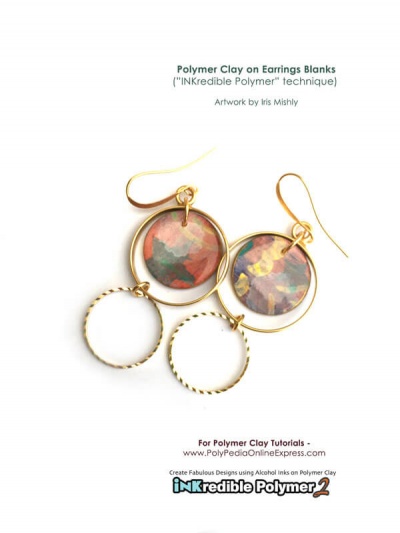
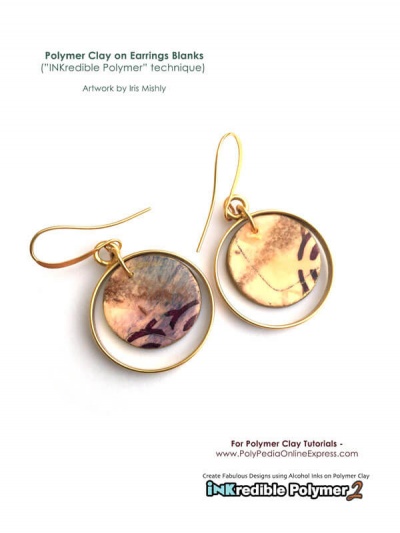
I’ve added a pair of earrings to go with it by simply cutting a circle smaller than my metal loops.
If you want to embed the clay inside the circle, either use an x-acto knife and cut around the inside of the blank or look for a circle cutter fit the diameter of the loop. I didn’t have such a cutter so I made them smaller. They dangled nicely on my ear.
Clear resin was placed on top of all my beads to protect the pattern from rubbing off in time.
Using clear resin on curved shapes is tricky so I used very little amount of it, making a thin thin layer. If you prefer to use a spray (PYM spray or other varnish), choose your preferred sealer.
~~~~~~~~~~~~~~~~~~~~~~~~~~~~~~~~ Want to see what I made with Becky’s Tube beads & a simple micro macrame pattern?
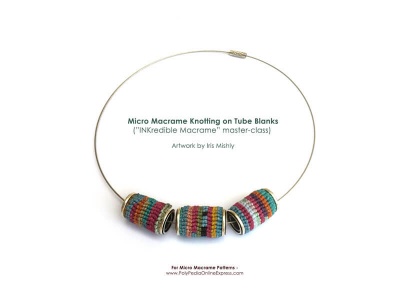
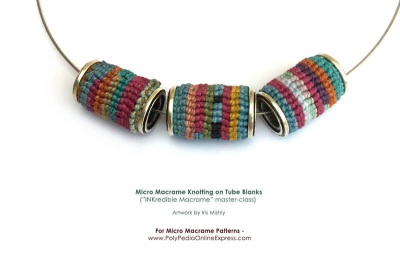
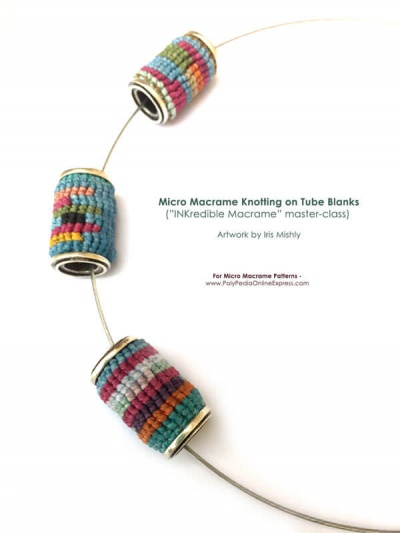
Micro macrame can be knotted into many shapes, sizes, widths and lengths.
I chose to use channeled beads and fill them with knots.
I could fill them with polymer clay but for these findings I wanted a different look.
The knots used here are called “Cavandoli” knotting. This kind of knotting creates a tapestry design, a geometric pattern and is very common to create special visuals such as letters, pixel drawings etc. I’m sure some of you did it when you were children making friendship bracelets. :)The cavandoli knotting is based on the Vertical Double Half Hitch knot (VDHH) and can be created freely or with a planned pattern.
(If are not familiar with macrame knots, you are welcome to check out my “INKredible Macrame” 29 classes set divided into B.A, M.A & Ph.D levels which include basics and comprehensive video patterns.)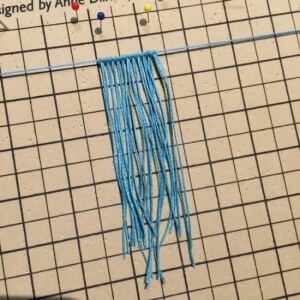 In the tube beads I used leftovers of cords from other projects and created lines of knots. Leftovers are perfect for this type of knotting.
I’m using Brazilian “Linhasita” 0.8 mm wax coated cord and created a main holding cord with cords hanging on it (using the larks head knot).
The number of cords depends on your cord thickness and the size of the bead channel.
I placed 11 cords (folded in half = 22 cord) and knotted for 8 rows (counting the first top mounting row as the first one).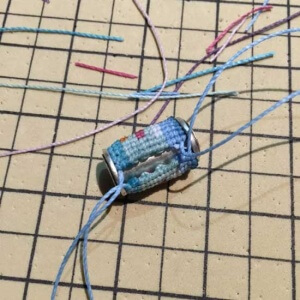 After completing the design (whether planned or spontaneous) I made sure I have 2 sets of cords to secure the sheet onto the metal tube bead (like a small carpet wrapped and knotted around a log).
This means I left 2 sets of cords longer from the sides to be able to tie them after completing the row knotting.
If you want to have more knots – leave longer cords on the edges, (next time I would leave 3 sets – one from the top, one on the bottom and one in the middle to get a tighter closure)
Here is a very short knotting video showing the movements of the cords and hands (no sound) –
That’s it!
A gallery of the final pieces – Aren’t they beautiful?
 ~~~~ DON’T MISS!! ~~~~~
A special offer available for “Nunn Design” subscribers – Use coupon code “nunn” on checkout and you will get an EXTRA 15% discount on all tutorials including the “INKredible Polymer” series and the “INKredible Macrame” series!

You can order them separately (each project individually) or as a set with kit, CD and goodies!
Thank you! :)
Iris Mishly -


1 comment
Trackbacks and pingbacks
[…] of these techniques are taken from one of Iris’s Master Classes. She has a quick and easy tutorial on…