As a teacher in the “Geelong Grammer School Fibre Forum” in Victoria Australia, I was asked to give a short presentation about my work to approx 100 students attending. Some have never heard of polymer clay yet alone know how to work with it.
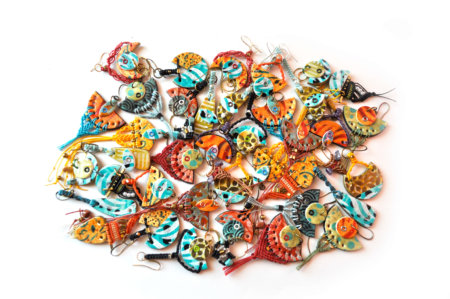
In my presentation, I have included a super quick 1-minute video demonstrating how I use polymer clay as “canvas” by adding stencils, paints, and chalks to make veneers. The final products were earrings.
Here is the longer version of this video, 5 minutes on how to create fun (and quick!) polymer clay veneers.
You will find more than 120 stencils in my Etsy shop (not all of them available in this website), so, if you feel “veneers under your fingers”, enjoy my saving late HALLOWEEN sale for a WEEK ONLY Until Nov 8th! https://www.etsy.com/shop/irismishly?section_id=14884370 FREE Shipping on all orders $35 and above, OR 25% off with coupon “IWANTSTENCILS“! :)
Have fun!
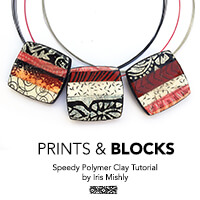
Wood blocks! Have you ever thought about using these on polymer clay? Now that’s an idea!
The other day I was walking in my town and noticed a shop de-stashing all its content. One of the items was wood printing blocks. I looked closely, knowing there was something I could use them with polymer clay.
Woodblock printing is a technique for printing text, images or patterns used widely throughout East Asia and originating in China as a method of printing on textiles and paper. Anyway, before I knew it, I bought all his stash – all 50 blocks :) and they sat on my shelf, for about a year.
Two months ago I decided to use them. I didn’t know what or how so I started playing with my favorite materials (acrylics and chalk pastels) knowing something fun would come out of it. And it did! 1-2-3 and you get a printed sheet! It’s so easy I had to make a video of it. I combined with image transfers, clear resin finish, and crackle medium and the result is colorful beads you can use in your everyday projects.
Enjoy a 3 minutes FREE speedy tutorial on how to create polymer clay sheets using carved wooden printing blocks –
For the project we will need — * Polymer clay of your choice * Wood Blocks (limited amount is available in my shop (sorry, all sold out!) * Cutters * Acrylic paints / chalk pastels / pan pastels * Sealer of your choice (I used clear resin)
All Tutorials 40% OFF – HUGE Spring Sale!
While you’re learning, enjoy A HUGE 40% Spring Sale on all my tutorials PLUS 10% on all my stencils!
https://www.etsy.com/shop/irismishly
Happy claying Iris Mishly

Your creativity and love to polymer clay is the reason I do what I do. I wish I could thank you each personally.
Thank you all 5000 PolyPediaOnline Facebook followers for your long support in my art!Although I am not as active as before I enjoy every minute doing polymer clay and my mind is constantly thinking about my next idea. Art is my life and will always be a part of me :)
As a small gift to all you talented people, I am sharing a time-lapse video, shooting one of “Flower Academy” projects – a classic life-like rose flower. This flower is then baked and assembled into a beautiful bouquet made entirely of polymer clay (in case you are wondering, this bouquet is heavy! it’s not a good idea for a bride to throw it to the crowd after the wedding! lol ;)
The full length project is about an hour long so this is a real “quick” version of it. I hope this project will inspire you to try creating your own flower decorations! They are beautiful and ever lasting!
Enjoy! Happy 2018 to us all!
Iris Mishly
~~~~~~~~~~~~~~~~~~~~
P.S – You’re welcome to follow my Facebook page for additional photos, updates and polymer clay adventures!
P.S 2 – Enjoy an “almost New Year” discount on all my tutorials – type coupon “2018iscoming” on checkout for 25% off all classes! (offer expires January 3rd)
 New polymer clay tutorial by Iris Mishly
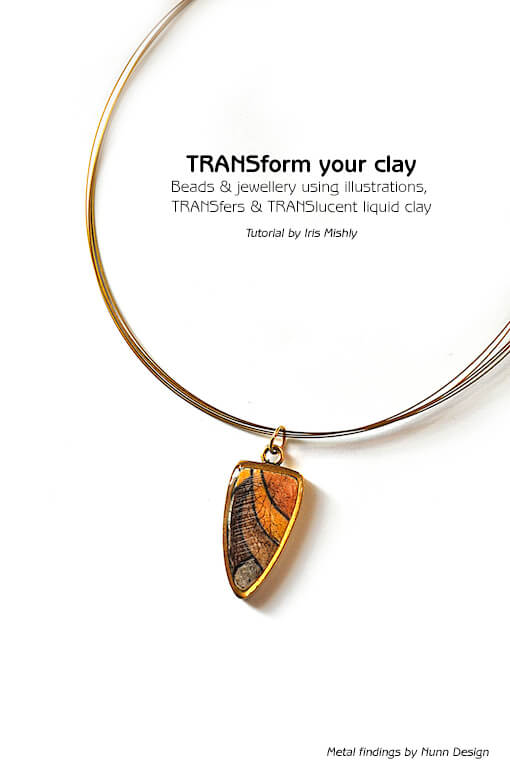
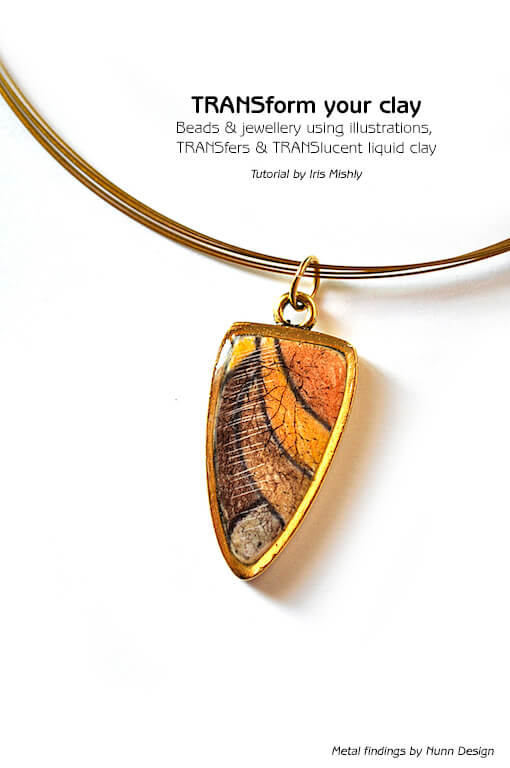
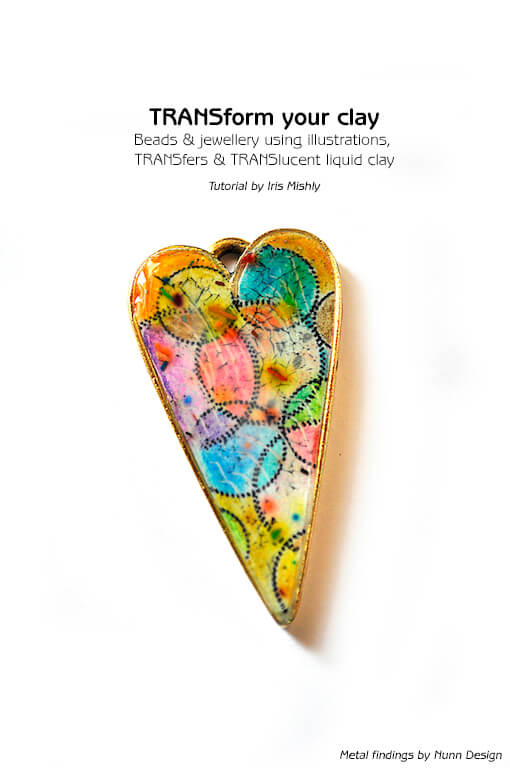
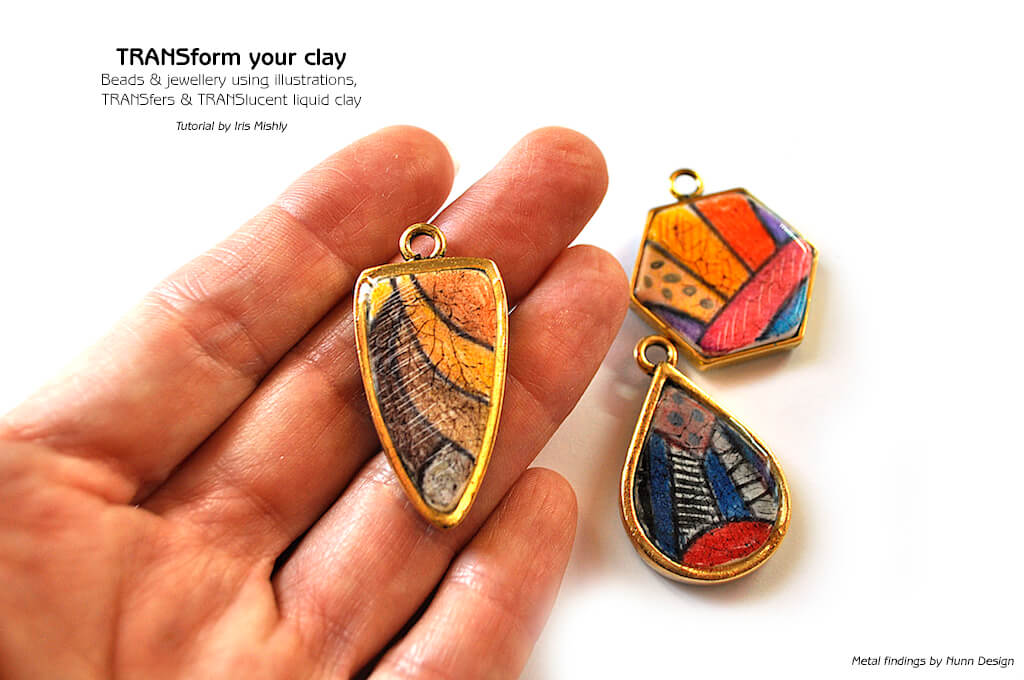
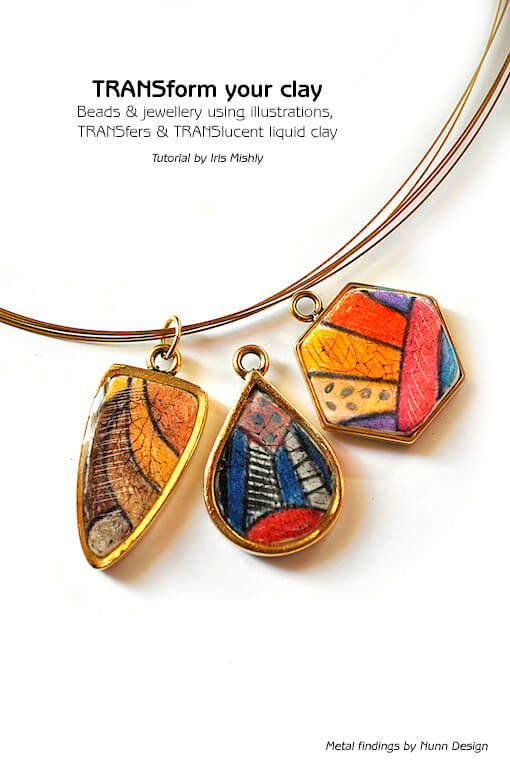
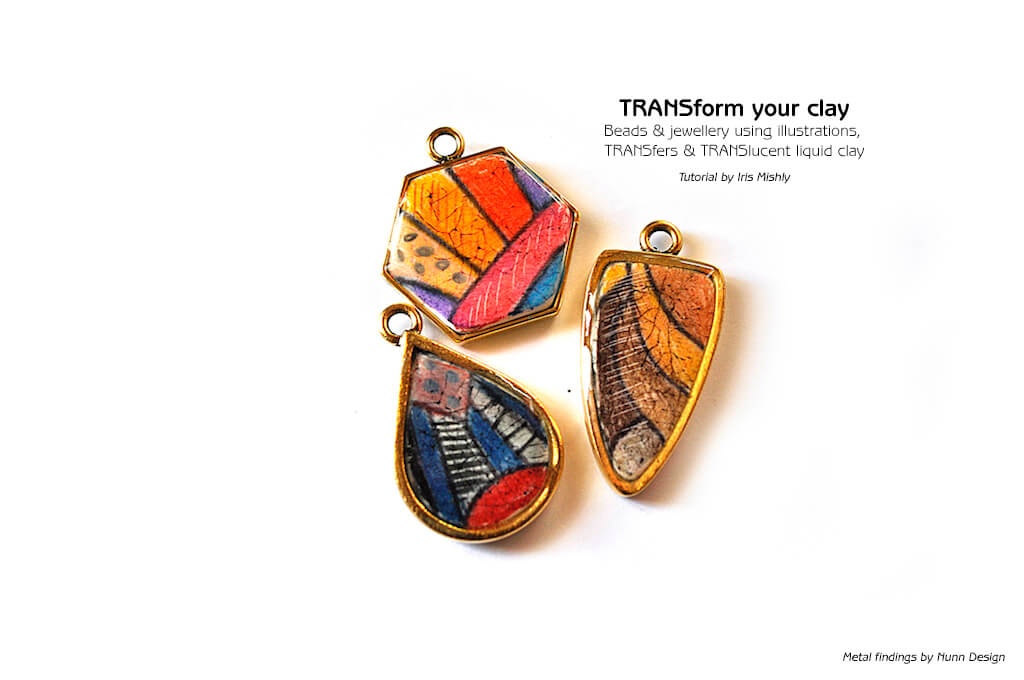
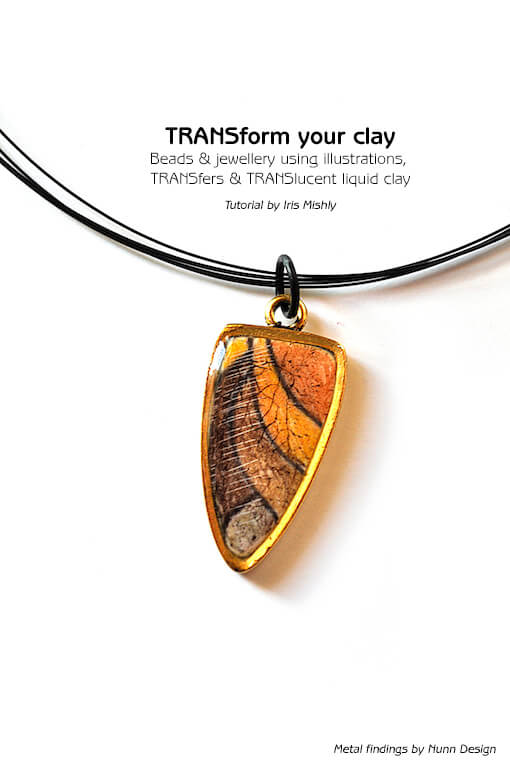
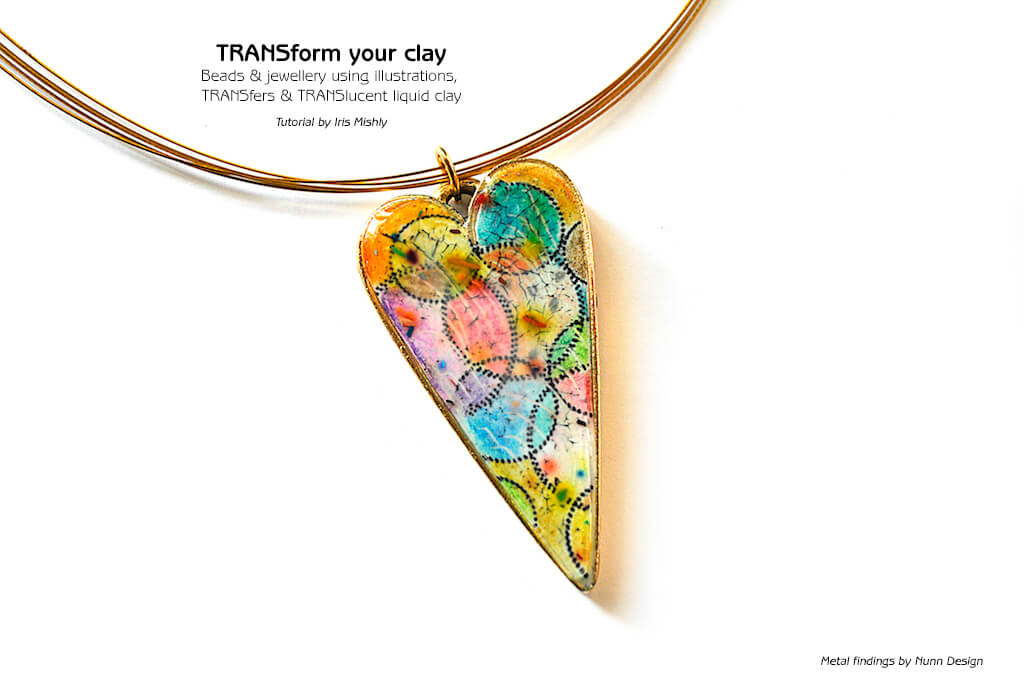
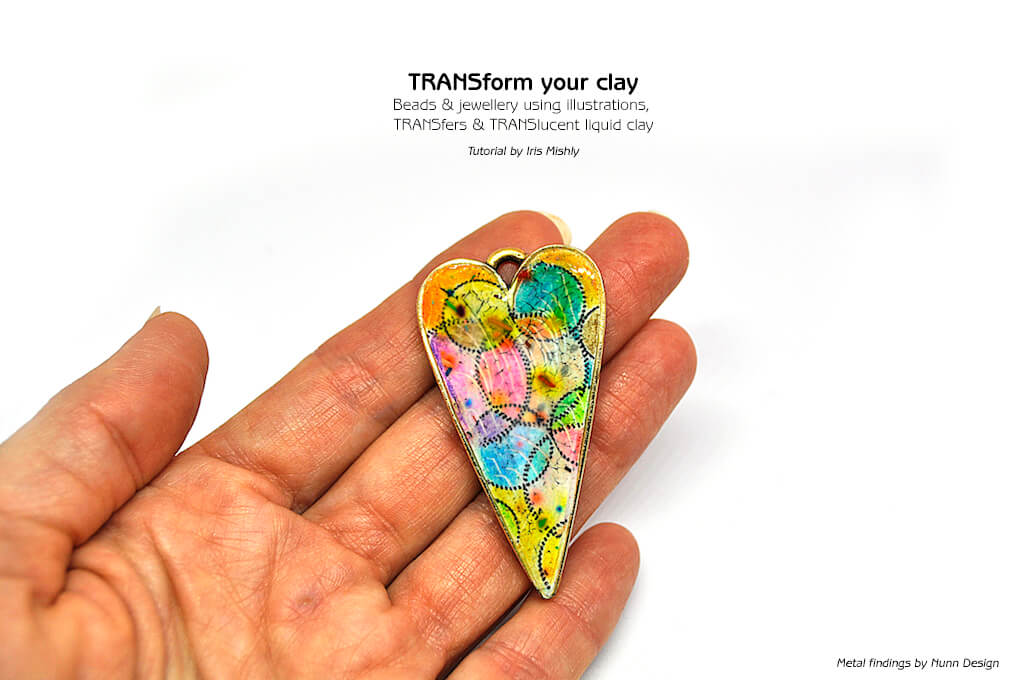
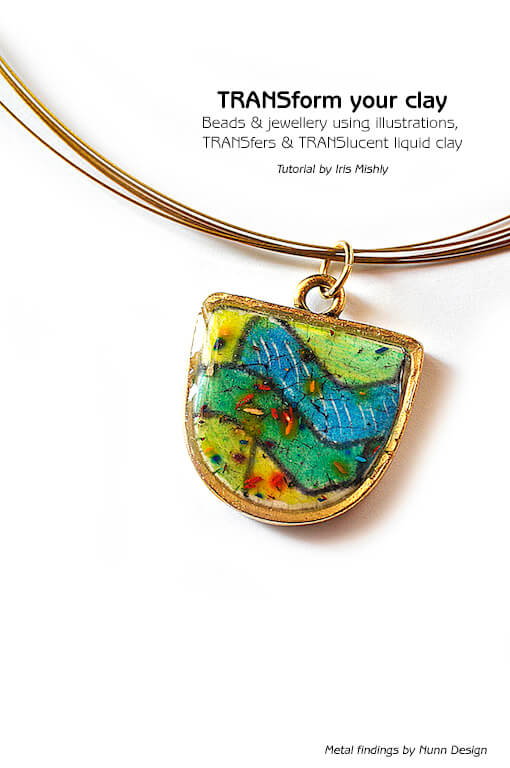
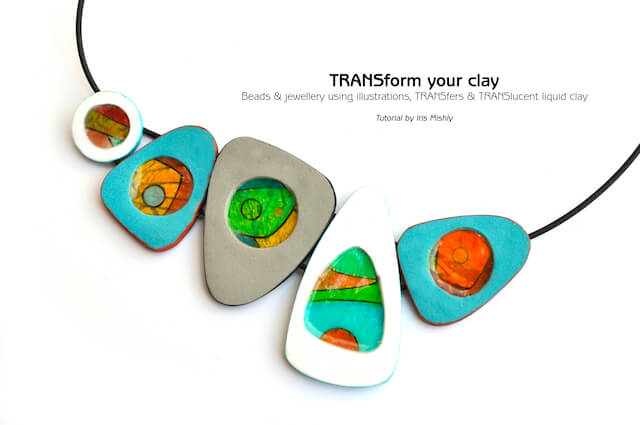
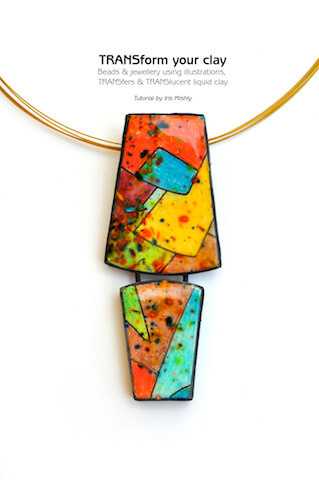
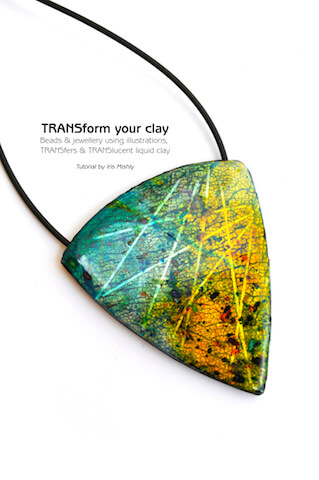
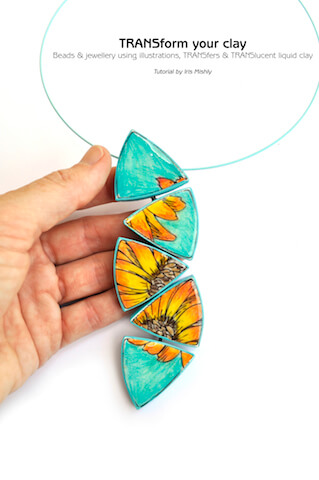
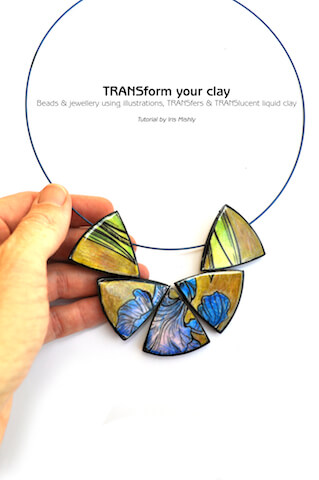
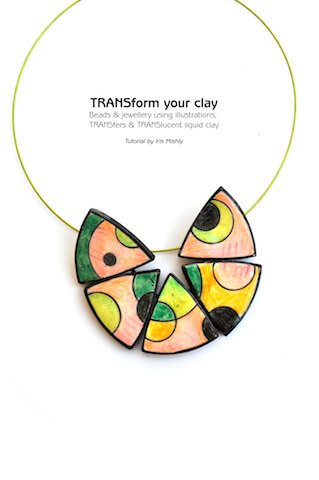
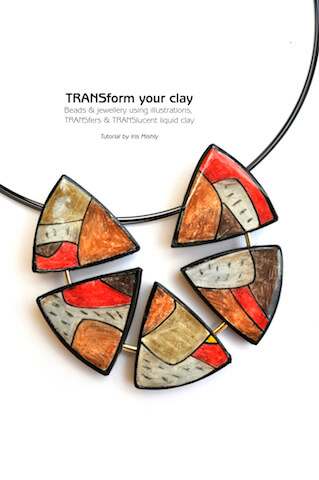
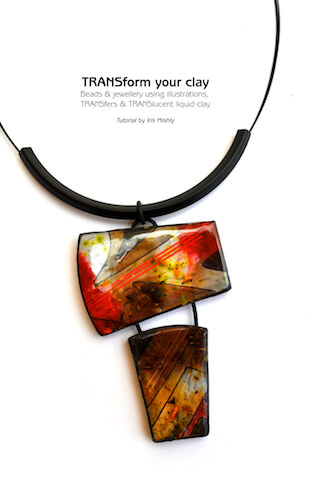
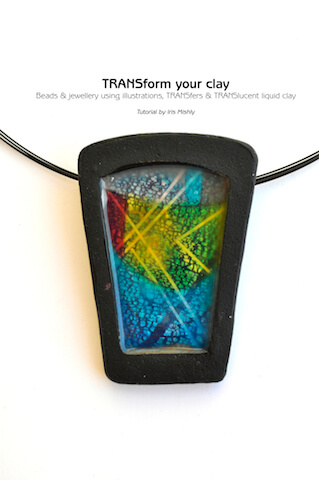
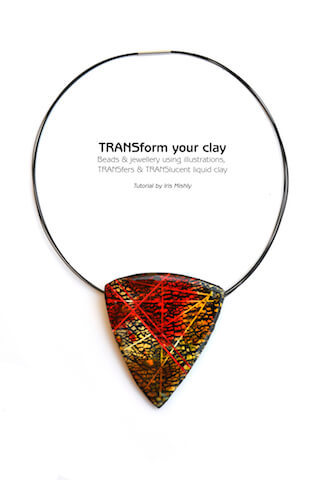
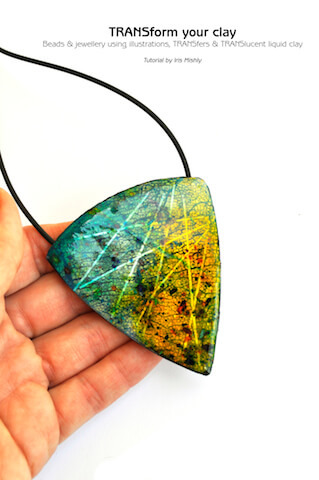
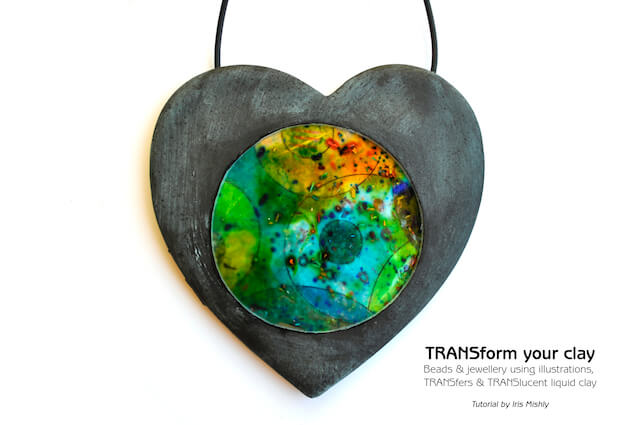
“TRANSform Your Clay”!
New polymer clay tutorial by Iris Mishly
“TRANSform Your Clay”!
—————————-
CLICK HERE TO JOIN MY CLASS!—————————-
More About “TRANSform Your Clay” Tutorial –
“TRANSform Your Clay” is a super clever, fun and unique class on how to create beads & jewelry using layering, illustrations, TRANSfers and TRANSlucent liquid clay. In 4 series video tutorials, you will learn a variety of illustrations and layering techniques. Learn how to use wax pencils as a clay painting medium with image transfers and liquid clay. Use digital technology (in computers and apps) to draw and design a final project. Create 3D layering effects to achieve original and unique beads. Assemble all your beautiful beads in a clever stringing design and create dazzling jewelry!~~~~~~~~~~~~~~~~~
Iris Mishly
#gallery-1 { margin: auto; } #gallery-1 .gallery-item { float: left; margin-top: 10px; text-align: center; width: 25%; } #gallery-1 img { border: 2px solid #cfcfcf; } #gallery-1 .gallery-caption { margin-left: 0; } /* see gallery_shortcode() in wp-includes/media.php */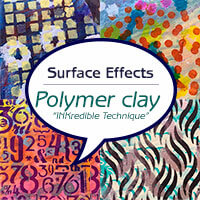 Use stencils with polymer clay like never before!
Create eye-catching, unconventional surface designs!
Use stencils with polymer clay like never before!
Create eye-catching, unconventional surface designs!
15 NEW stencils to use with polymer clay!
The new stencils are smaller in size, therefore the patterns are finer. As opposed to huge wall stencils this is super important when creating a small bead, pendant or pattern on polymer clay sheet.
No adhesive! Made of thick plastic they are perfect for polymer clay. No neutralizing is required.
Fun geometric and nature inspired patterns including cats, zigzags, hearts, flowers, flames, animal skins, numbers, bricks, multi-patterns-in-1! Use them on raw/baked clay, skinner blends, inks, paints, gold leaf, powders! Apply them with paints, spray, chalk inks or pastels and many more!
——————————————-
Want to learn how to use stencils with polymer clay? Find all these surface techniques (and others!) in my “INKredible 2” & “INKredible Macrame” tutorials collection NOW offered at 20% OFF**!
** No need for coupon, price reduced after added to cart.
——————————————-
Add new stencils to your templates collection! ONLY 3-4 stencils from each design are available!
FREE international shipping!
https://www.polypediaonlineexpress.com/product-category/tools/stencils/
Special sale EXPIRES June 18th!
ohh!! P.S – 2 of you lucky buyers will get a brand new beautiful bead from the new stencil collection sent to your home!
Get your stencils today while still in stock!
Creativity is the best thing ever. For me, It is the cure to all things, healing to all stress and the perfect relaxation.
The past months were full of preparations for my Slovenia and Germany polymer classes. I was basically planned to teach almost all my techniques – INKredible (alcohol inks), Extrudinary (extruder), liquid clays, faux ceramic, Brocade Collection (purses) and even my new macrame classes! Yep, I more or less packed all my studio and placed it in my suitcases! ;) (Did I mentioned I took 50 kg of project samples, tools and materials with me? ohh thank god I had my DH to help me carry it all!)
Now that I’m finally un-packed and hoping to relax a bit after that intense week, (help! Passover holiday!) I am happy to share some photos & videos of my classes & expreience.
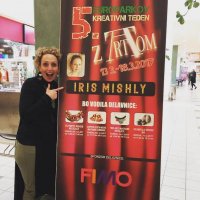
I was invited by Mihaela Vindis, the acting manager of ART shop in Maribor, Slovenia to join her yearly “2017 Creative Week” taking place in a beautiful shopping mall named “Europark Maribor”. All classes are offered in a very intensive-creative week, featuring more than 20 craft teachers (international & local) and more than 1000+ students coming from all over Europe to attend the workshops.
This is without a doubt a HUGE festival of art, offering classes on all crafts, hobby and DIY such as wood, painting, wire, fiber, paper, fabric, polymer (of course), recycling, jewellery making, metals and so much more!
My co-polymer colleague in the event was the amazing Maggie Maggio and both of us were offering workshops demonstrating the many faces of polymer clay.
What can I say, the event WAS AMAZING! Incredible talent and vibe of artists and crafters! Perfect venue and VERY creative Slovenian people! Words can not express the energy going on! Outstanding atmosphere!
Here is a short video giving a short view (too short to my opinion!) of that fabulous event –
Video copyrights – ART Trade, Maribor Slovenia
Additional photos? Enjoy this presentation –
My next stop was at Ariane Freislebens’ gallery “Galerie Freisleben” in Ubersee Germany, which is, to my amazement, a gallery completely dedicated to the polymer clay art.
The gallery, located next to the beautiful Chiemsee lake, include collective polymer clay art by international artists both for sale and for display. It is the most beautiful polymer museum I ever saw! (Ariane also offer lodging for her students and guests and the apartments are as pretty as the gallery itself – such fine design! :)
The classes were fun and joyous, relaxing and educational, Arianes’ clay ladies students were dedicated, funny yet hard working artists enjoying a wonderful weekend full of clay! The classroom was filled with buzzing workers up until 23:00 every day! haaaa!
Ariane’s schedule is packed with talented artists coming to teach so make sure to check it out to be updated on her future classes.
So thank you Ariane for an amazing stay in your piece of heaven, your kingdom is the perfect dream of any polymer clay artist!
Photos? here is a fun presentation of the amazing weekend –
I wish to thank all my hosts, friends, students for granting me the opportunity to enjoy full days of clay, happiness and getting a 1st class treatment of a movie star! ;) Thank you Staedtler for sponsoring our clay! I am deeply thankful for everything and hope I will meet you all again! <3
Christmas Celebration with PolyPediaOnline!
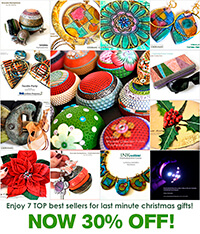
Still on the hunt for the perfect gift? An hour is all you need! Make the most of today’s savings and create your own HANDMADE gift!
A tree ornament, a polymer clay purse/giftbox or a new jewel to wear on new years eve! It will bring smiles to loved ones and you can make it just in time to put under the tree!
Enjoy the TOP 7 polymer clay tutorials for last minute christmas gifts! NOW 30% OFF!1. Create your own bouquet by making one of the most beautiful christmas flowers -The Poinsettia Flower! This flower tutorial is one of the “Flower Academy” class, demonstrating all steps necessary to create a life-like flower! Make it small or large to fit any theme, wrapping or jewel! https://www.polypediaonlineexpress.com/product/flower-academy-polymer-clay-flowers-tutorial-poinsettia-flower-ebookvideo/
2. Another Christmas flower to place on your gifts or made into a brooch – Holly Branch! A branch so life-like can become a gift to cherish for ever! https://www.polypediaonlineexpress.com/product/flower-academy-polymer-clay-flowers-tutorial-holly-branch-ebookvideo/
3. Looking for an original packaging for your jewellery? A tree ornament with a hidden led light bulb? Have you tried the “Brocade Collection” zippered purses? This clever zipper purse can be the perfect gift box for a necklace or earring set given to your loved ones PLUS it can be used again and again as a small coin/candy pouch! The class is demonstrating a round purse but you will learn how to use any shape you want! https://www.polypediaonlineexpress.com/product/polymer-clay-brocade-collection-zippered-purses-tutorial-ebookvideos/
4. A speedy necklace for New Years Eve? Try the INKredible Luminous! This breathtaking jewel is a quick project using simple tools and materials you probably have at your studio! https://www.polypediaonlineexpress.com/product/inkredible-alcohol-inks-polymer-clay-tutorial-luminous-metallics-necklace-ebookvideo/
5. Use alcohol inks along with a unique “drawing” technique! Another INKredible best seller earring project, the “Textile Party” tutorial offering a ooak design using paints, inks and stencils to create a dazzling pattern sheet for your earrings, brooches, pendants or beads! https://www.polypediaonlineexpress.com/product/inkredible-polymer-textile-party-earrings-polymer-clay-tutorial-alcohol-inks-ebookvideos/
6. Mix faux ceramic with chalk pastels and ink and get a beautiful “Cosmic Ceramic” surface – The GreenLand bracelet! This project will give you inspiration for any jewel, bead of your choice! You can even create one as a tree ornament! https://www.polypediaonlineexpress.com/product/cosmic-ceramic-polymer-clay-tutorial-faux-ceramic-greenland-bracelet-ebookvideo/
7. One of the most quick yet fun projects I ever made! Himalayan Totem beads! Paint with chalk pastels and create your own unique pattern! Trust me, it’s like painting a colouring book! Success is guaranteed! https://www.polypediaonlineexpress.com/product/cosmic-ceramic-polymer-clay-tutorial-faux-ceramic-himalayan-totem-pendants-ebookvideo/
Give (or Get) 🎁 the Gift of Creativity!
==> NO NEED TO TYPE A COUPON! FREE INTERNATIONAL SHIPPING on all kits! —————————————————————————— ** Offer expires December 20th, 2016
Happy holidays! <3 Iris.
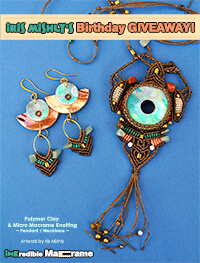
Come Celebrate my 45th Birthday! Macrame Jewellery GiveAway!
DRAWING IS CLOSED – WINNER WAS ANNOUNCED November 25th 2016, on FACEBOOK – Kathryn Peters! Congratulations!
Thank you all!
======================
November is my birthday month celebrating 45 years, And I’m giving YOU a birthday gift!
As much as I love to create macrame jewellery I enjoy even more giving it as a gift! (this makes me want to make more and more!) My 2 sisters are usually my “fashion victims” for gift jewellery (ha ha) but I’m always happy to offer one of my loyal subscribers, students and customers a gift too!
This set includes an earring set and a macrame necklace-pendant taken from my “Stingray” collection. The necklace can be adjusted into a long jewel on your chest or worn close to your neck as a pendant (the adjustable closure is sliding on the cords to a short/long strap)
All beads are made of polymer clay (made with the techniques I teach in my “INKredible 2” polymer clay tutorials set), ear wire are gold plated and cords are brown wax cords (with a touch of beige, peach and green).
—————– Want to be included in the raffle? —————– Add a comment to this blog post down below with your full name and email so I’ll know how to contact you if you win.
Winner will be announced in my “PolyPediaOnline” Facebook page on November 25th,
~————————————————————————————-~ P.S – Excited about Black Friday? So am I! 45% off on ALL PolyPediaOnlineExpress site!
This is the perfect time of the year to get ready for the holidays and prepare wonderful gifts for yourself & loved ones!
Keep an eye out on my sale emails!
Good luck! :)
Iris
Faux Marble Polymer Clay Cane | FREE How To Video Tutorial
I was always fascinated with faux effects and granite / marble stones were definitely one of them. Beautiful mineral stones weaved in veins and patterns – amazing! I was determined to think of a way transform these patterns into a marble polymer clay cane.
The idea to use food processor as a mixing tool occured to me when I purchased a new one. At first it was just for mixing old clay into scrap sheets but then I thought it would be handy if I control the colors and amount of clay. Luckily I have so many old clay packages as well as old millefiori canes, so I thought I’d give it a try.
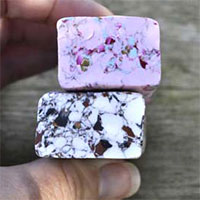
There are many ways to create a faux marble effect, this is my version, I call it “Cane Rocks”.
So what are the ingredients? I chose a single small pack of white old fimo clay (56 grams) and about 20-30 grams of millefiori canes. The amount will determine the relations between the colors. A ratio of 1/3 to 1 is good when it comes to creating this effect.
IMPORTANT! You may use any clay of your choice (I had old “FIMO” and fresh “Premo” so I chose the old dry ones). It is important that the clay will be dry. If the clay is too fresh the clay will mix into a scrap colour and won’t create the “marble effect”.
You are not limited to use millefiori canes only. Any clay color would work but the millefiori canes give an extra deep effect of colors inside the marble cane which add quality and realistic effect to the final result.
As for the food processor – I am using my old “moulinex” machine, it’s about 20 years old (I got it when I got married!) The bowl is made of plastic so it is better to spray it with baby oil to make leftovers scraping easier and leaving as little clay on the plastic as possible. You will see the spray in my 2nd demo (I forgot to do it with the first cane). If you do have leftovers clay on the plastic bowl make sure you clean it as soon as possible so it won’t cause any chemical reaction with it.
Don’t have a food processor? You can definitely cut your clay small and do the same chopping but it will probably take more time.
Enjoy the demo of my CANE ROCKS!
For the beads and final earrings I layered a background sheet and placed slices on top to form a unified sheet. I used a roller to flatten and attach both layers together. A cutter was used to form the bead shape. Each bead was baked and coated with clear resin to create shiny marble look. The holes were drilled after baking.
Here are close up photos of the canes, beads and jewellery –
I hope you liked this short demo and would love to see your marble cane rocks! Thank you for watching!
:)
Iris
 Let’s make creative gifts! The 2nd side of my polymer clay business
When I first started making polymer clay art I was all into production work.
Colorfull blessing key holders as affordable gifts
At first it was millefiori all the way, inside out and around, but after about 4 years I got bored and started looking for a new adventure. Still investigating my path, finding my artistic voice in the polymer clay world I turned to writing tutorials. This was my new way of expressing my creativity while teaching hobbyists to use this medium using the experience and knowledge I’ve gathered in time.
Over time I’ve learned that we, artists, tend to hide “production” side of our business. Why? Mainly because “production work” is not considered too artsy, it’s something you do again and again, you don’t “invent” the wheel, you just keep duplicating it. It’s kind of 50% art, not the full 100%.
Do we loose our artistic voice when we do production work? There was a time I believed that to be true but today, after “inventing the wheel” for more than 7 years, occasionally I’m drawn back to the therapeutic process of duplication. It’s so relaxing. Like baking the same cookies again and again. Some people enjoy ironing, some love folding laundry and I enjoy production work :)
Hamsa wall decor with home blessing in hebrew and english
Production line can give us a steady income when we don’t feel artistic enough to “eureka” something new but it can also become boring in time. I tend to switch between my both sides – Being creative and being productive.
While real production work reduces costs, for us, artists, the cost is nearly the same. Yes, we can fasten up the process a bit but it would be nothing like machinery or mass production. Time is still the same time and material is still the same material per unit.
I still run a small production line in my studio, it’s usually made-to-order: small souvenirs for a wedding or celebration, gifts to co-workers, retirements/farewell gifts and other events people want to give something to one another. I even have a completely separate website for that line of work, the site is called CreativeGifts.co.il and it is for local viewers (hebrew language).
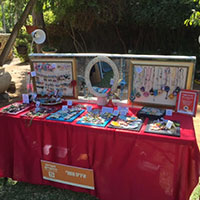
Last month I was a part of several holidays shows so geared up for the task and made mountains of key holders, charms, hair clips, bookmarks gifts fitting a small budget. Naturally I’ve added my new polymer-macrame jewellery collection, which was a huge success.
Photos?
My table has a built set up handmade by my husband ;) It’s a wood-plexiglass construction planned to hold 2 photo frames. I’m lucky to have an engineer at home! This set up allow me to play with the items hung on the boards and I can use them at home too when I’m not selling outdoors.
I’ve used simple IKEA photo frames as a display for on table and used a small jewellery box to angle the frame a bit. The coloured frame gives a nice contrast to the displayed items.
See the blue, red and black frames holding the jewellery? IKEA photo frames
Black photo frame to display my polymer-macrame Stingray pendants
Stingray pendants on IKEA photo frame
I even got a beautiful picture of one of my customers – Thank you Mrs. Deirdre Gordon Stein for sending along this beautiful photo of you wearing my Stingray pendant :)
Here is a short glimpse into my table –
After returning home I had time to deal with the endless mess in my studio. I wonder where my blue genie – he always disappear when I need him!
Here are before & after shots ;)
Thank you for reading! See you soon :)
Iris Mishly.
Before :(
After! :)


