Search Results for: alcohol ink
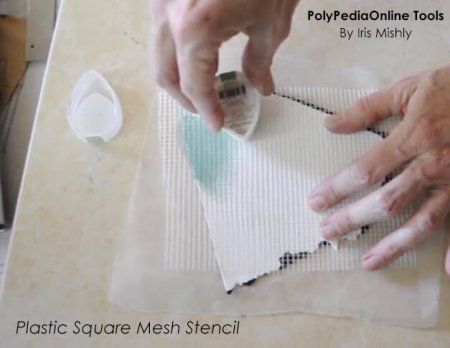
Stencil, Wall stencil, Mesh squares stencil, Plastic template pattern for polymer clay, earthen clay, paper, cards, wood and many more!
I am always on the lookout for great patterns for polymer clay.
This plastic mesh pattern is used for various construction purposes and it is the perfect texture or pattern for our clay sheets.
These mesh stencils are –
• Comfortable, elastic stencil
• Washable & reusable
• Can be embedded inside the clay for texture or placed on top of a polymer clay sheet along with ink stamping (see photo).
• Re-positionable
• Suitable for application upon curved areas
This sale is for a four (4) sheets of stencils.
******************************************************
♥ Price: $8.90
No additional Shipping Costs! – International shipping & handling fee included.
♥ Size – 4 inch * 4 inch // 10 cm * 10 cm
*** Please let me know if you need a different size.
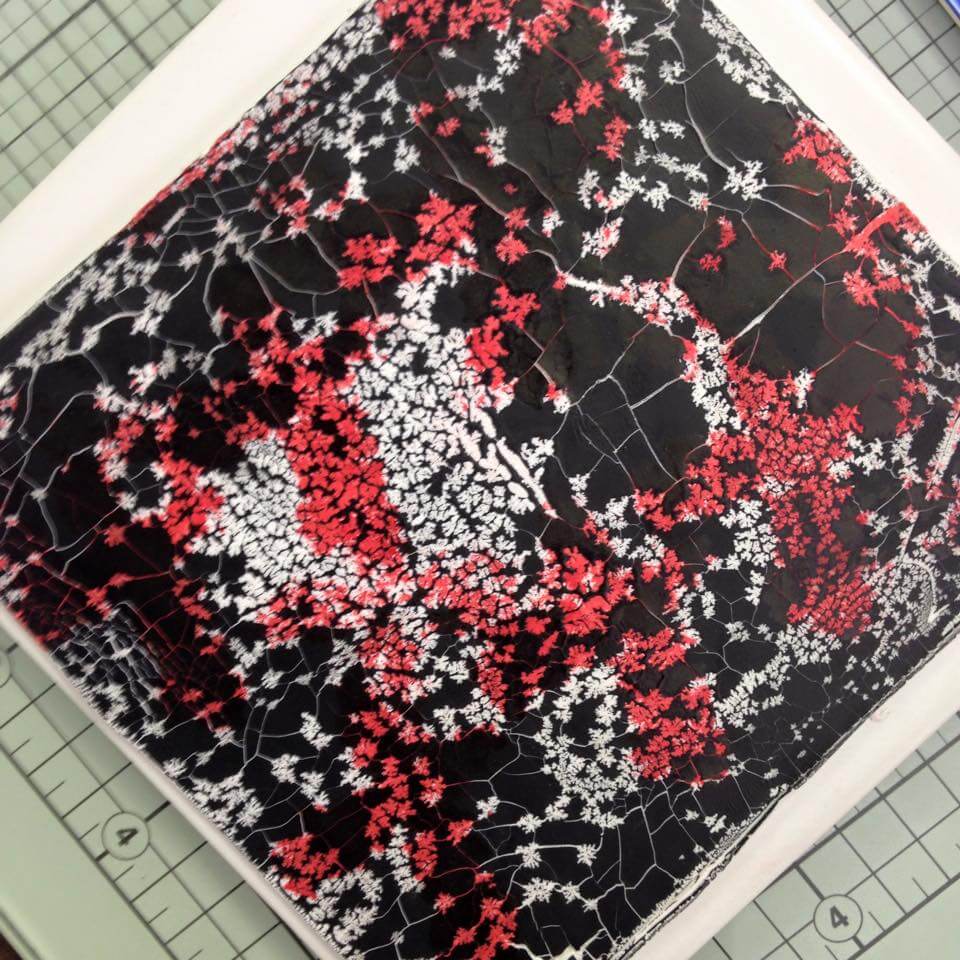
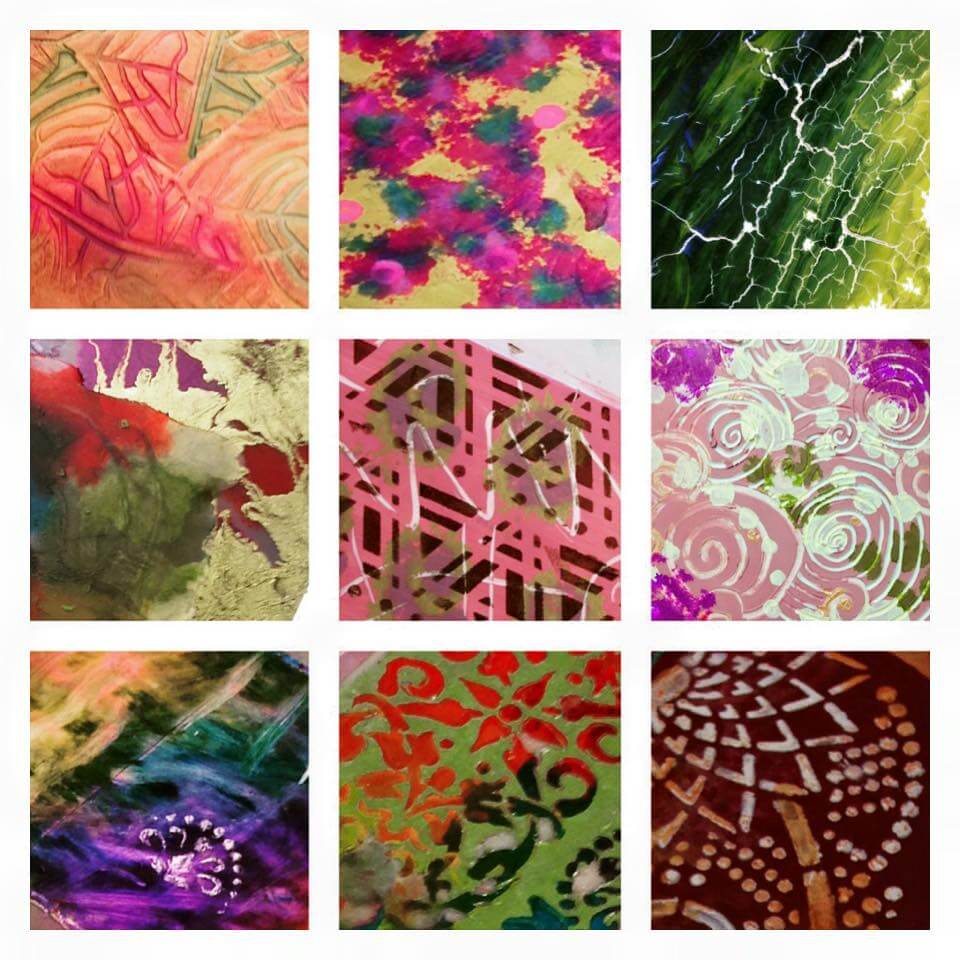
These stencils were used in my “INKredible Polymer Red Matrix” Alcohol inks polymer clay class.
The tutorial is available here – https://www.polypediaonlineexpress.com/product/inkredible-polymer-dot-matrix-earrings-polymer-clay-tutorial-alcohol-inks-ebookvideos/
** Last photos demonstrates designs created with these stencils, for general view only, not included with the sale.
Christmas Celebration with PolyPediaOnline!
Still on the hunt for the perfect gift? An hour is all you need! Make the most of today’s savings and create your own HANDMADE gift!
A tree ornament, a polymer clay purse/giftbox or a new jewel to wear on new years eve! It will bring smiles to loved ones and you can make it just in time to put under the tree!
Enjoy the TOP 7 polymer clay tutorials for last minute christmas gifts! NOW 30% OFF!1. Create your own bouquet by making one of the most beautiful christmas flowers -The Poinsettia Flower! This flower tutorial is one of the “Flower Academy” class, demonstrating all steps necessary to create a life-like flower! Make it small or large to fit any theme, wrapping or jewel! https://www.polypediaonlineexpress.com/product/flower-academy-polymer-clay-flowers-tutorial-poinsettia-flower-ebookvideo/
2. Another Christmas flower to place on your gifts or made into a brooch – Holly Branch! A branch so life-like can become a gift to cherish for ever! https://www.polypediaonlineexpress.com/product/flower-academy-polymer-clay-flowers-tutorial-holly-branch-ebookvideo/
3. Looking for an original packaging for your jewellery? A tree ornament with a hidden led light bulb? Have you tried the “Brocade Collection” zippered purses? This clever zipper purse can be the perfect gift box for a necklace or earring set given to your loved ones PLUS it can be used again and again as a small coin/candy pouch! The class is demonstrating a round purse but you will learn how to use any shape you want! https://www.polypediaonlineexpress.com/product/polymer-clay-brocade-collection-zippered-purses-tutorial-ebookvideos/
4. A speedy necklace for New Years Eve? Try the INKredible Luminous! This breathtaking jewel is a quick project using simple tools and materials you probably have at your studio! https://www.polypediaonlineexpress.com/product/inkredible-alcohol-inks-polymer-clay-tutorial-luminous-metallics-necklace-ebookvideo/
5. Use alcohol inks along with a unique “drawing” technique! Another INKredible best seller earring project, the “Textile Party” tutorial offering a ooak design using paints, inks and stencils to create a dazzling pattern sheet for your earrings, brooches, pendants or beads! https://www.polypediaonlineexpress.com/product/inkredible-polymer-textile-party-earrings-polymer-clay-tutorial-alcohol-inks-ebookvideos/
6. Mix faux ceramic with chalk pastels and ink and get a beautiful “Cosmic Ceramic” surface – The GreenLand bracelet! This project will give you inspiration for any jewel, bead of your choice! You can even create one as a tree ornament! https://www.polypediaonlineexpress.com/product/cosmic-ceramic-polymer-clay-tutorial-faux-ceramic-greenland-bracelet-ebookvideo/
7. One of the most quick yet fun projects I ever made! Himalayan Totem beads! Paint with chalk pastels and create your own unique pattern! Trust me, it’s like painting a colouring book! Success is guaranteed! https://www.polypediaonlineexpress.com/product/cosmic-ceramic-polymer-clay-tutorial-faux-ceramic-himalayan-totem-pendants-ebookvideo/
Give (or Get) 🎁 the Gift of Creativity!
==> NO NEED TO TYPE A COUPON! FREE INTERNATIONAL SHIPPING on all kits! —————————————————————————— ** Offer expires December 20th, 2016
Happy holidays! <3 Iris.
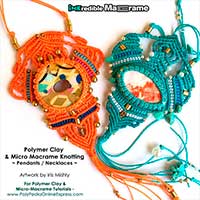
When becky from “Nunn Design” offered me to play with her findings and add polymer clay and micro macrame I couldn’t say no :)
Becky is the fairy of findings. She has a unique collection of beautiful products called “Elements of Inspiration®” creating wearable art and elegant jewelry. Bezels, shanks, pendants, glass, earrings, rings, bracelets, pewter, gold plated, silver plated and so much more – Anything for your art, style and colour.
So I headed to her catalog and chose findings to create with. Hard choices! So many great stuff there! but I was having polymer clay in my mind and how to use it along with her findings: clay sheets covering metal channels or combined together inside loops, tubes, circles and earrings. I couldn’t stop at polymer alone so I’ve tried it with macrame knotting as well. Haaaa! what a joy! The final result is so stylish and elegant! A complete upgrade of your regular findings!
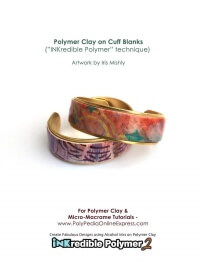
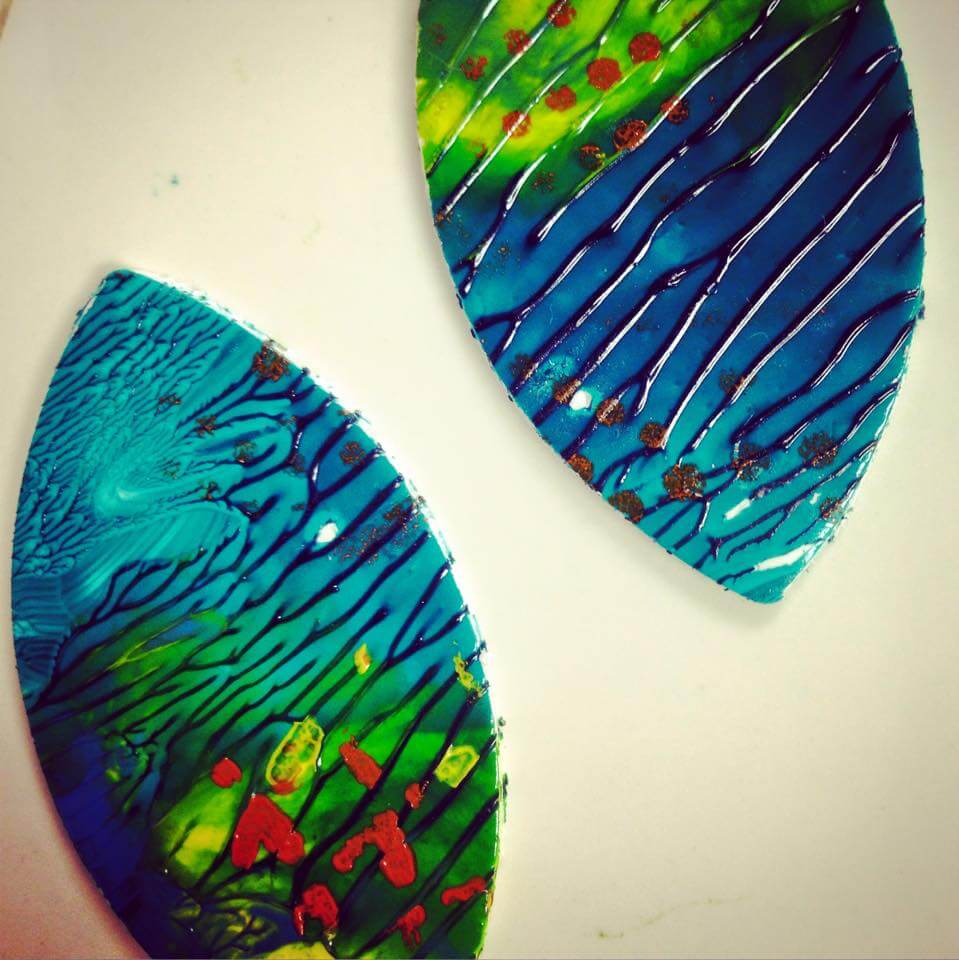
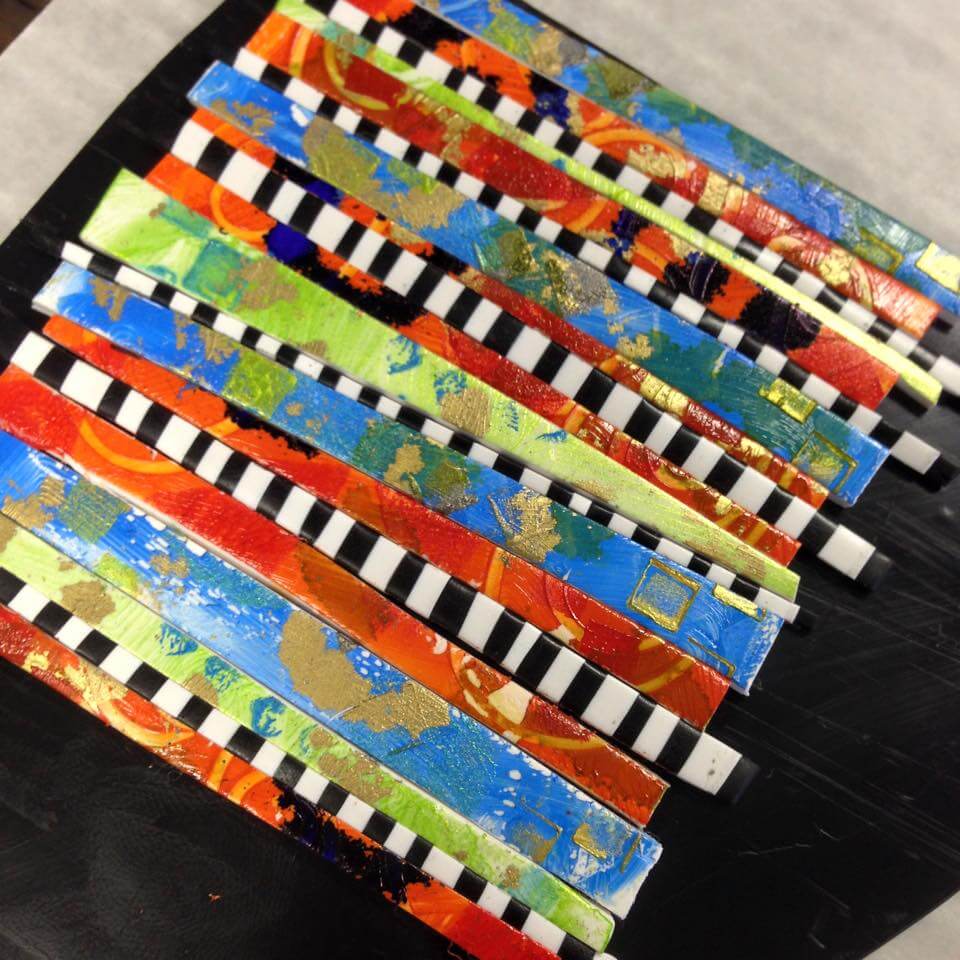
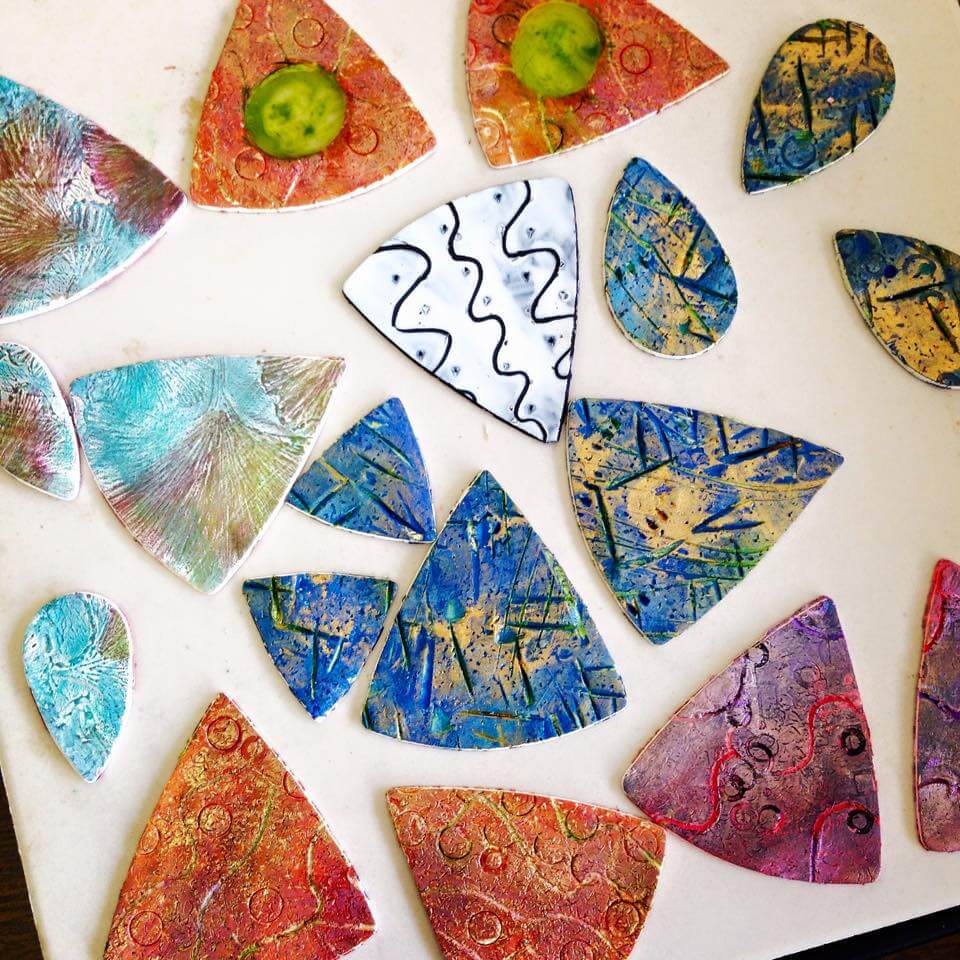
Polymer clay & alcohol inks sheets – Free Polymer Clay TutorialMy first on the list were the cuffs and earrings, I made a polymer clay sheet decorated with inks and goodies. The technique used here was a part of my “INKredible Polymer 2” class using various materials on clay and adding alcohol inks
First step was to prepare the sheets with colours and patterns. The sheets were rolled medium-thin in the pasta machine to fit the cuff channel blank (see on top of the photo). I used a piece of paper as a template to measure the exact size I’ll need for the metal blank. I have used my beloved stencils for both sheets – the “Doily” stencil pattern and the “Infinite Stars” pattern. (as for all the other secrets ingredients you’ll have to own the class to know ;) Second step was to decide where to place the template (hard decision!! LOL), I think I changed my mind a hundred times :) Placing and cutting. Liquid polymer clay was used to adhere the raw polymer clay sheet onto the metal blank, this will assure a good bondage of both layers together after baking is complete. Make sure you work on the rounded edges to fit your design. You want the cuff to slide onto your wrist without scratching your skin. Remember to fix the cuff size BEFORE baking. Polymer clay is not flexible after baking and if you change the size of the blank after the clay is baked you may crack or break your pattern. Ready to bake! I’ve added a pair of earrings to go with it by simply cutting a circle smaller than my metal loops. If you want to embed the clay inside the circle, either use an x-acto knife and cut around the inside of the blank or look for a circle cutter fit the diameter of the loop. I didn’t have such a cutter so I made them smaller. They dangled nicely on my ear. Clear resin was placed on top of all my beads to protect the pattern from rubbing off in time. Using clear resin on curved shapes is tricky so I used very little amount of it, making a thin thin layer. If you prefer to use a spray (PYM spray or other varnish), choose your preferred sealer. #gallery-1 { margin: auto; } #gallery-1 .gallery-item { float: left; margin-top: 10px; text-align: center; width: 50%; } #gallery-1 img { border: 2px solid #cfcfcf; } #gallery-1 .gallery-caption { margin-left: 0; } /* see gallery_shortcode() in wp-includes/media.php */~~~~~~~~~~~~~~~~~~~~~~~~~~~~~~~~
Want to see what I made with Becky’s Tube beads & a simple micro macrame pattern?Micro macrame can be knotted into many shapes, sizes, widths and lengths. I chose to use channeled beads and fill them with knots. I could fill them with polymer clay but for these findings I wanted a different look. The knots used here are called “Cavandoli” knotting. This kind of knotting creates a tapestry design, a geometric pattern and is very common to create special visuals such as letters, pixel drawings etc. I’m sure some of you did it when you were children making friendship bracelets. :)
The cavandoli knotting is based on the Vertical Double Half Hitch knot (VDHH) and can be created freely or with a planned pattern. (If are not familiar with macrame knots, you are welcome to check out my “INKredible Macrame” 29 classes set divided into B.A, M.A & Ph.D levels which include basics and comprehensive video patterns.)
In the tube beads I used leftovers of cords from other projects and created lines of knots. Leftovers are perfect for this type of knotting. I’m using Brazilian “Linhasita” 0.8 mm wax coated cord and created a main holding cord with cords hanging on it (using the larks head knot). The number of cords depends on your cord thickness and the size of the bead channel. I placed 11 cords (folded in half = 22 cord) and knotted for 8 rows (counting the first top mounting row as the first one).
After completing the design (whether planned or spontaneous) I made sure I have 2 sets of cords to secure the sheet onto the metal tube bead (like a small carpet wrapped and knotted around a log).
This means I left 2 sets of cords longer from the sides to be able to tie them after completing the row knotting. If you want to have more knots – leave longer cords on the edges, (next time I would leave 3 sets – one from the top, one on the bottom and one in the middle to get a tighter closure)
Here is a very short knotting video showing the movements of the cords and hands (no sound) –
That’s it!
A gallery of the final pieces – Aren’t they beautiful?
#gallery-2 { margin: auto; } #gallery-2 .gallery-item { float: left; margin-top: 10px; text-align: center; width: 50%; } #gallery-2 img { border: 2px solid #cfcfcf; } #gallery-2 .gallery-caption { margin-left: 0; } /* see gallery_shortcode() in wp-includes/media.php */~~~~ DON’T MISS!! ~~~~~ A special offer available for “Nunn Design” subscribers – Use coupon code “nunn” on checkout and you will get an EXTRA 15% discount on all tutorials including the “INKredible Polymer” series and the “INKredible Macrame” series!
You can order them separately (each project individually) or as a set with kit, CD and goodies!
Thank you! :) Iris Mishly
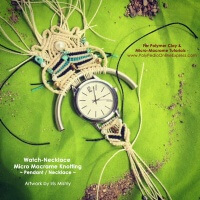
Have you ever thought of combining polymer clay, a hand watch and micro macrame cords?
In the early days we used to wear a watch to know the time. Now we have our phones…
In my recent designs I was looking for original ways to play with knotted designs and one of the ideas popped in my head was a “watch-necklace”; Something large, bold and pretty. I started a quest looking (and “borrowing”…) friends and family vintage “drawers-stored” old hand watches and use them as a part of a long necklace design. The final result is an impressive, unusual knotted jewel especially when upgrading the look with polymer clay beads!
Make them long, short, make them large or small, add an earring set – Everything goes!
Micro macrame knots and waxed cords are used to connect both pieces together while using the watch side bars (metal tubes connecting the straps) as connecting points to the different elements and cording.
Some of them had slightly different connection on the back side so I had to play with the cords until I found the trick. It’s not perfect yet but I’ve learned a lot by trial & error! I’m sure the next one would be better!
Here is another batch of my recent polymer-macrame-pendants right out of the oven;
—————- In these designs I am using beads with the “INKredible Polymer 2” technique using various materials over polymer clay sheets combined with alcohol inks.
The “INKredible Polymer 2” class is now offered for a special 20%OFF sale until May 16th 2016;, No need to type a coupon, price will be reduced after added to cart! Don’t miss it! https://www.polypediaonlineexpress.com/product/complete-inkredible-2-alcohol-inks-polymer-clay-tutorials-ebookvideoscd/
Ready to add cords to your beads? All micro macrame patterns are also on sale here – https://www.polypediaonlineexpress.com/product-category/technique/micro-macrame-pattern/
—————-
Now go search your drawers! You may find a treasure hidden there! ?
Each year I am kindly asked to send donations to polymer clay guilds organizing events.
These jewelry donations are being auctioned and the earnings goes to a worthy cause.
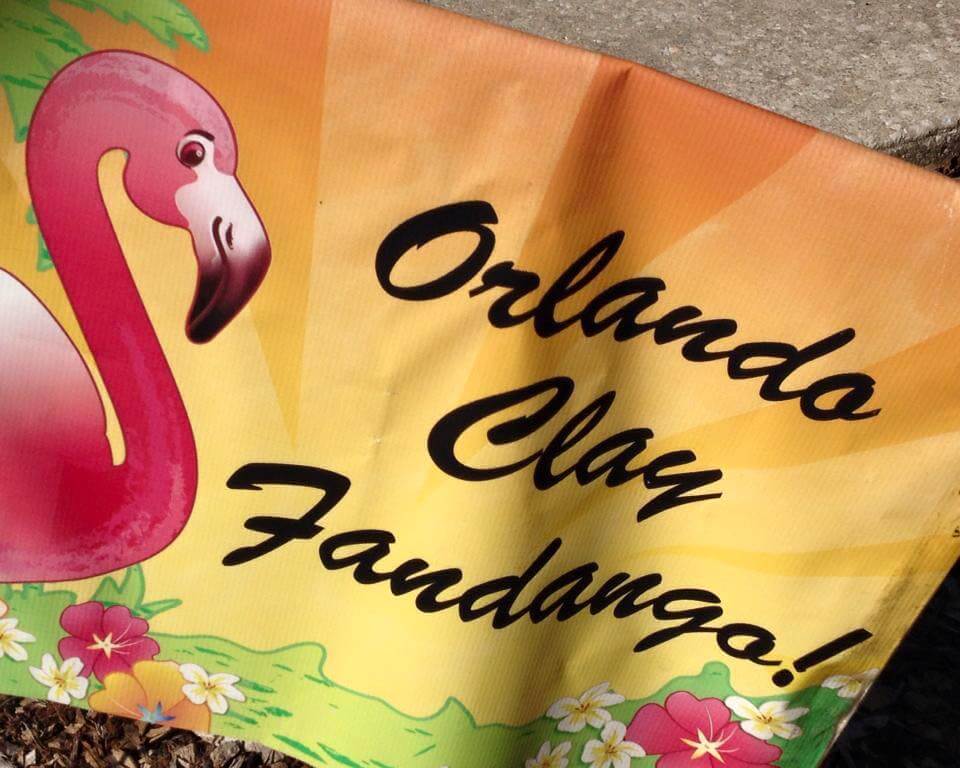
This year have sent 2 polymer-macrame jewellery sets: One set was sent to the Orlando polymer clay guild “Orlando Fandango 2016” event, and the other set was sent to the Central Oklahoma guild – “OK Poly-Clay 2016 Twisters Retreat”.
Both sets were created with beads from my INKredible technique, using alcohol inks, paints, stamps & stencils and micro macrame knotting taken from the “INKredible Macrame” master class.
The knotting technique is using the shape of the bead to create the design itself, nothing is planned ahead :) Your base bead can be round, teardrop shape, oval etc.
First, the bead is wrapped using a knotted setting (like in this bracelet), then, the cords are gathered into 2 groups/sets – one to create the top part of the design (sometimes divided again into several groups) and the second group is decorating the bottom part of the bead. The cords do not have to be long as we are simply creating our pendant. The long necklace is attached to the finished pendant, later. I love to use the cords and add single beads to make a sort of a tassel!
I am using the Linhasita cords which are cotton cords treated with a wax finish (made in brazil). These cords have the tendency to give a neat and accurate look.
—————————-
Embellish your beads with macrame knotting!
Enjoy a special 25% discount for the upcoming Easter holiday on ALL “INKredible Macrame” & “INKredible Polymer” tutorials! NOTE – No need to type a coupon – price will be reduced after adding to cart. Offer expires March 29th midnight.
CLICK ON LINKS BELOW to start Inking, Knotting or both! Special goodies kit is included when ordering the “complete sets” –
https://www.polypediaonlineexpress.com/product-category/technique/micro-macrame-pattern/ https://www.polypediaonlineexpress.com/product-category/technique/alcohol-inks-techniques/
—————————-
I’m sure folks at the Orlando & Oklahoma retreat will enjoy their time claying with friends and I’m happy and honored to be giving back to the community who supports me!
Take care :) Iris
CLICK ON LINKS BELOW to start Inking, Knotting or both! Special goodies kit is included when ordering the “complete sets” –
https://www.polypediaonlineexpress.com/product-category/technique/micro-macrame-pattern/ https://www.polypediaonlineexpress.com/product-category/technique/alcohol-inks-techniques/
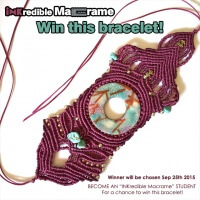
We have a winner of the students micro macrame giveaway handmade bracelet! Rita Hammock! Congratulations! You are the winner of a fancy new micro macrame bracelet made especially as a gift to one of my students :)
The bracelet was made using Linhasita wax cords and a focal polymer clay bead made with the “INKredible Polymer 2” alcohol inks technique. The bead was carved with a central channel for easy threading of all cords around it. Each side of the strap is different to create unique, fashionable appearence – You can play with your design to make it real one-of-a-kind :)
Thank you all B.A, M.A and Ph.D students who joined the Polymer Clay – Micro Macrame adventure, you are about to enter a new world of joy! The new class is available at www.polypediaonlineexpress.com shop.
Thank you all participants of the giveaway!
See you soon!
Congratulations Rebecca Chisenhall! You are the winner of the “guessing game“!
Thank you all for your wonderful comments! It was so interesting reading them all; So original and different one from another!
Some of you thought the new class is an “A-Z polymer encyclopedia”, some thought extruded projects, some “original polymer beads using lots of different techniques”, threads, mix media, transfers and…Macrame!
Yes! Most of you were close! Mix Media, threads, different techniques, transfers – ALL INCLUDED!
My new class is all about new alcohol inks techniques, polymer clay beads & micro macrame knotting!
FORMAL ANNOUNCEMENT TOMORROW but till then –
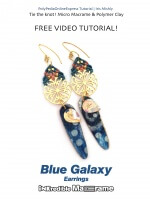
Here is a sneak peek on a quick and easy micro macrame project, a FREEbie “Blue Galaxy” tutorial demonstrating an earrings project made of a polymer clay bead, metal findings and wax cords.
Although Micro macramé is mostly about 3-4 knots, many people are intimidated by it.
BUT! With good guidance you will succeed!
In my classes I address all the steps necessary to complete a project, breaking the learning into small segments, clear filming angles, slow motions & close-up shots, making sure all the information you need is provided to you!
The formal class announcement will be sent to your email tomorrow so make sure you check your inbox –
Lot’s of gifts, giveaways and goodies are on their way to you! BUT…Gifts stock is limited! Don’t miss it!
Enjoy this short and fun video & if you have cords nearby, give it a try!
Ready for your own INKredible adventure? JOIN the INKredibles with endless creative projects to inspire you! https://www.polypediaonlineexpress.com/inkredible2-inkredible-macrame-polymer-clay-tutorials/ Iris.
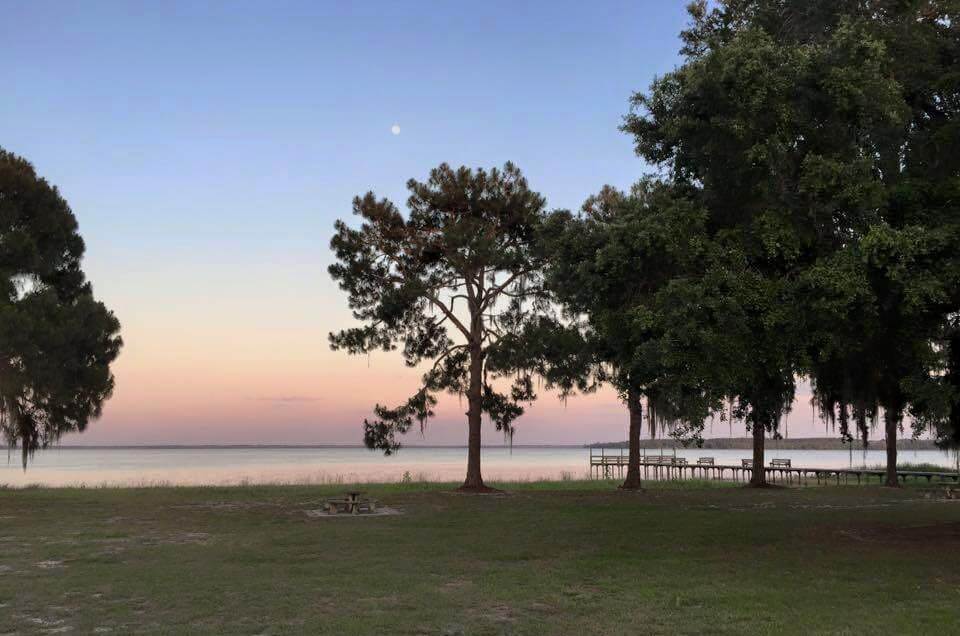
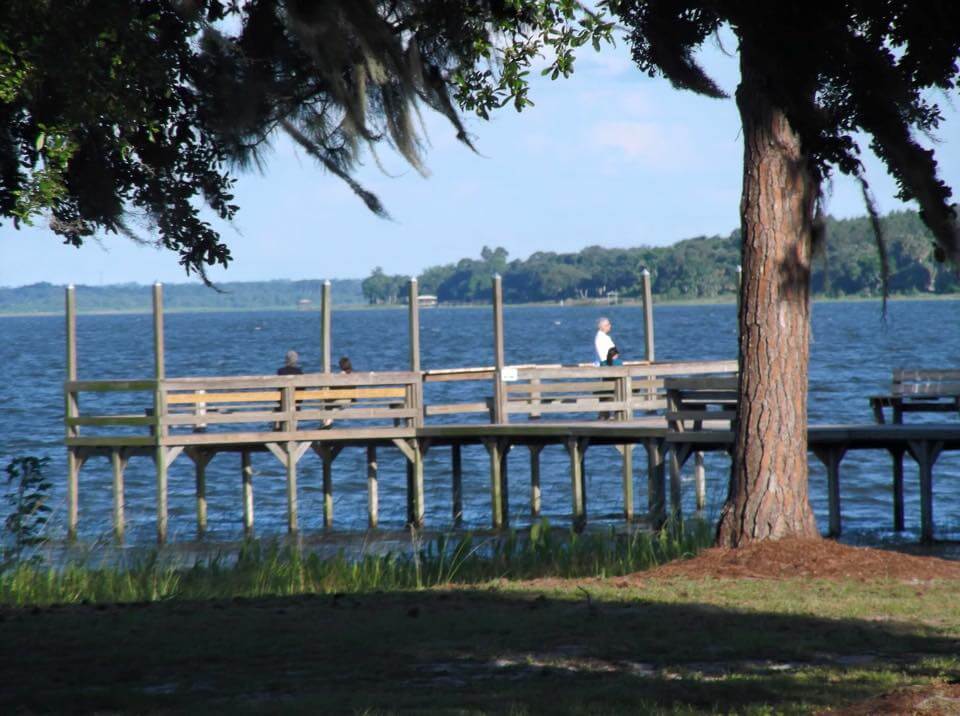
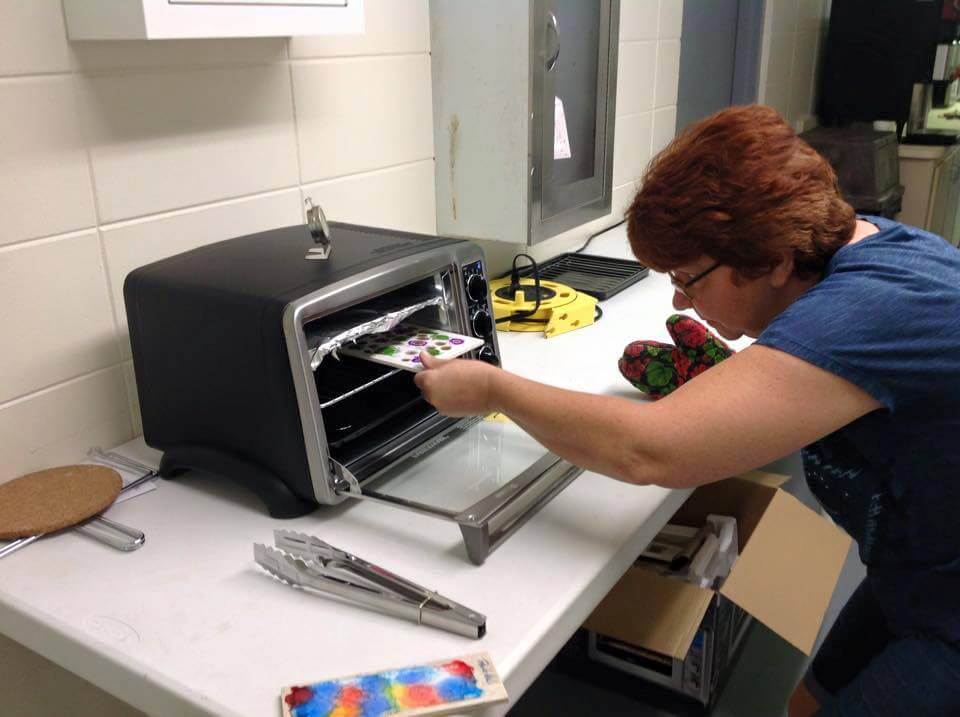
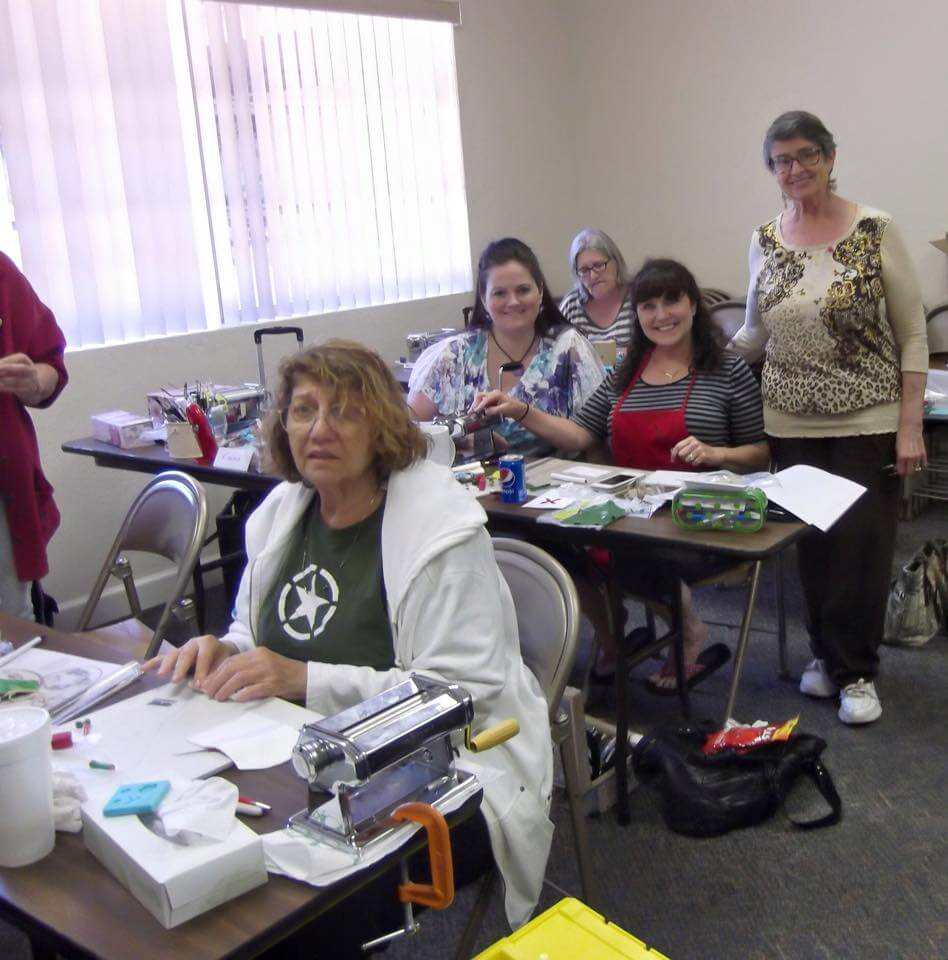
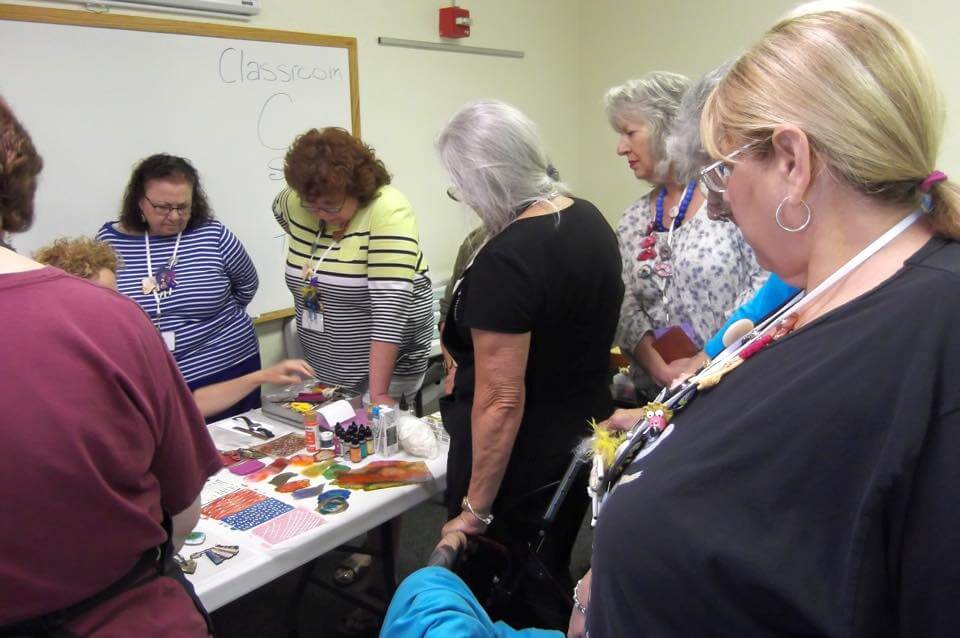
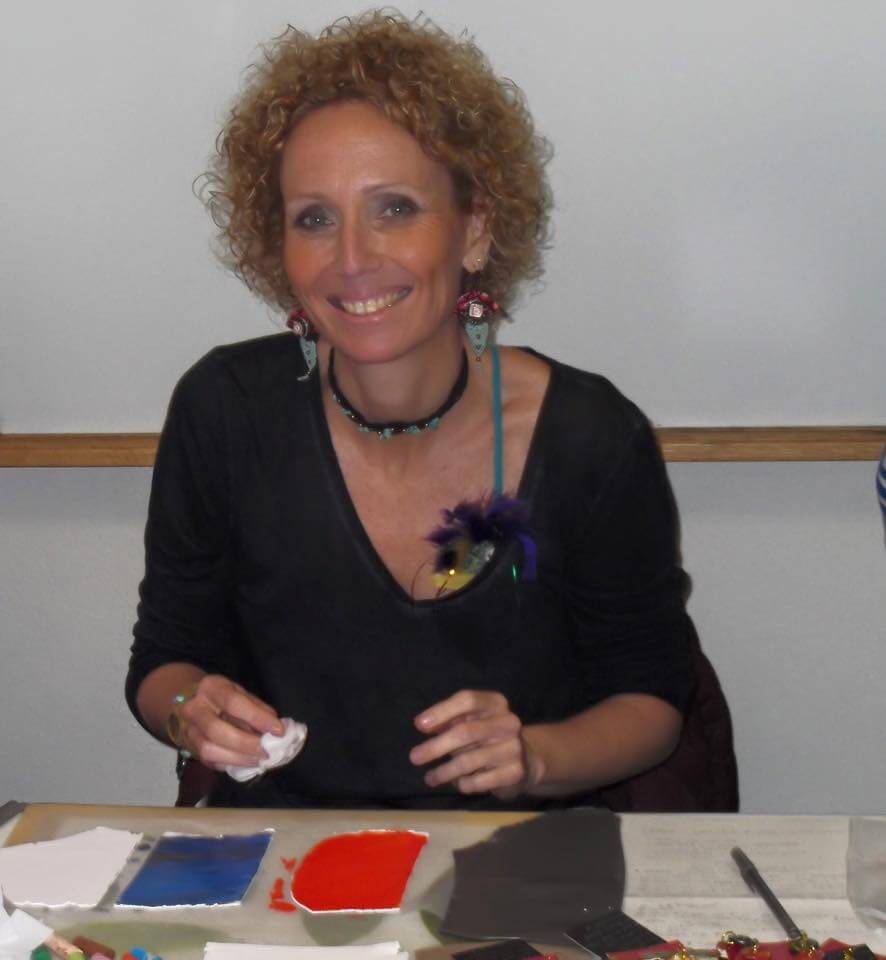
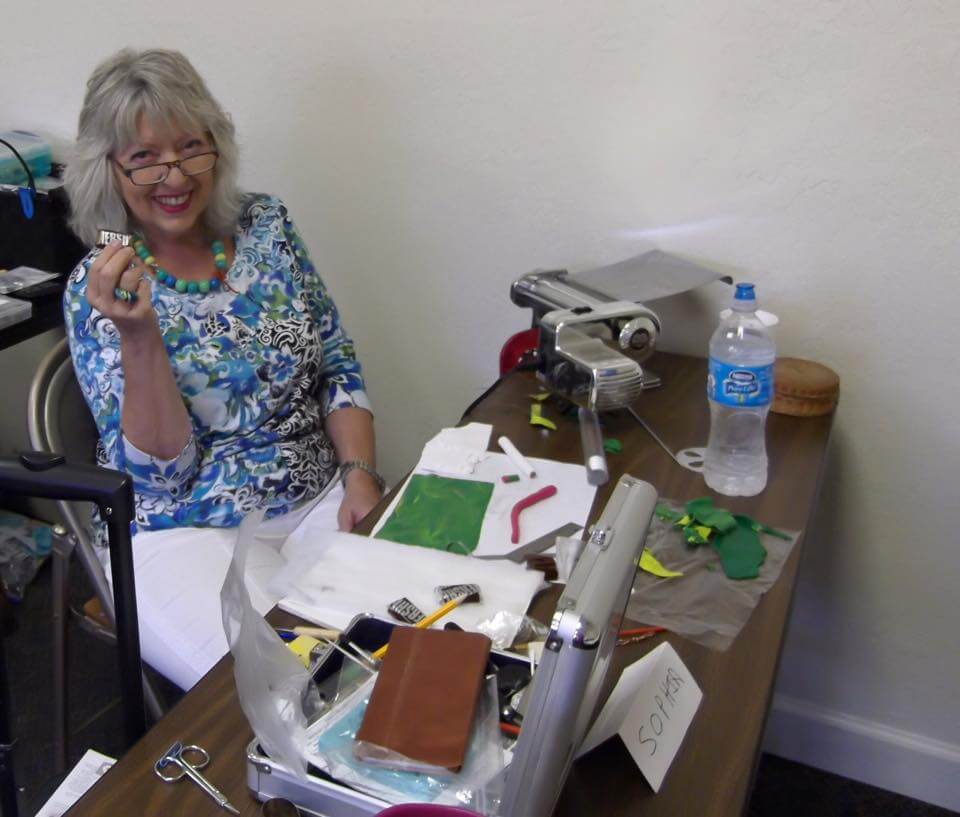
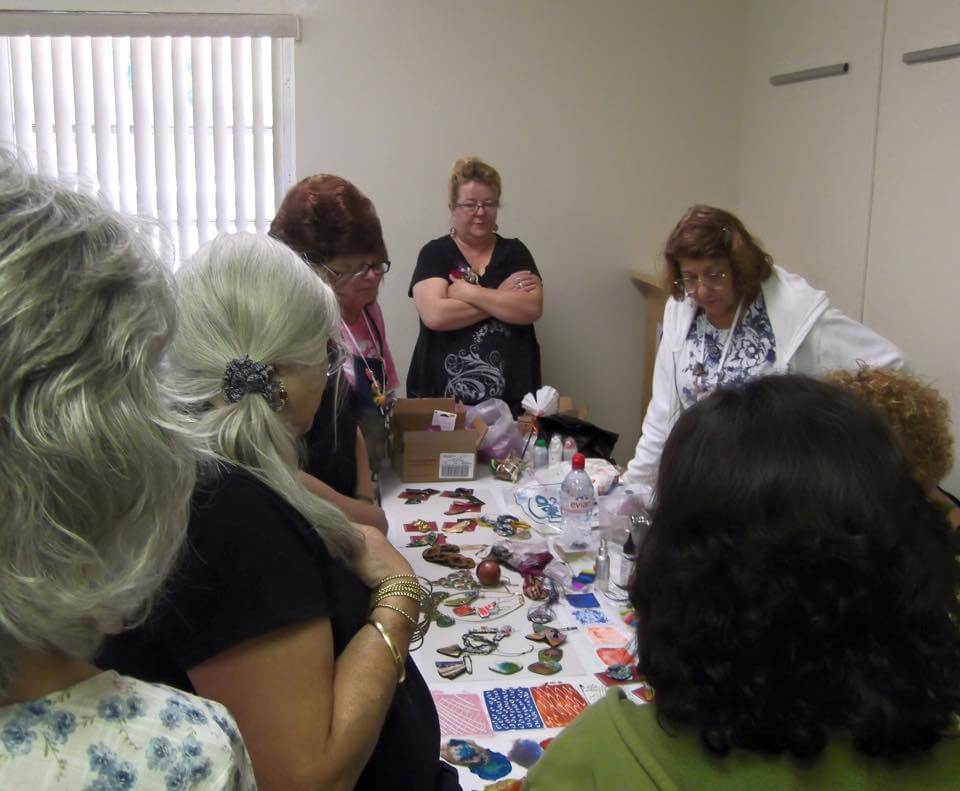
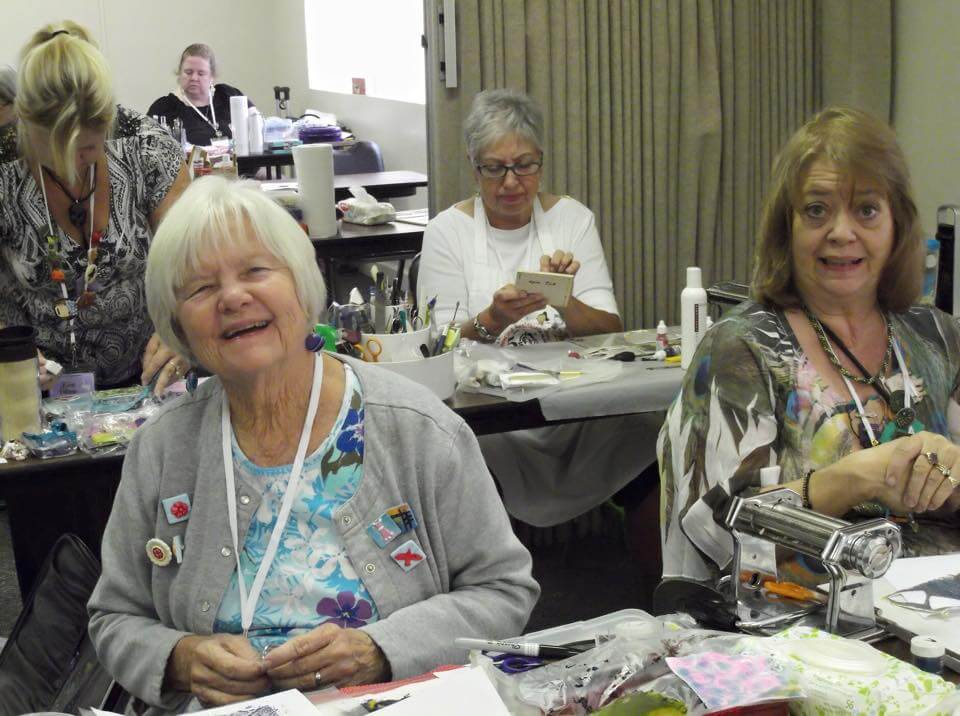
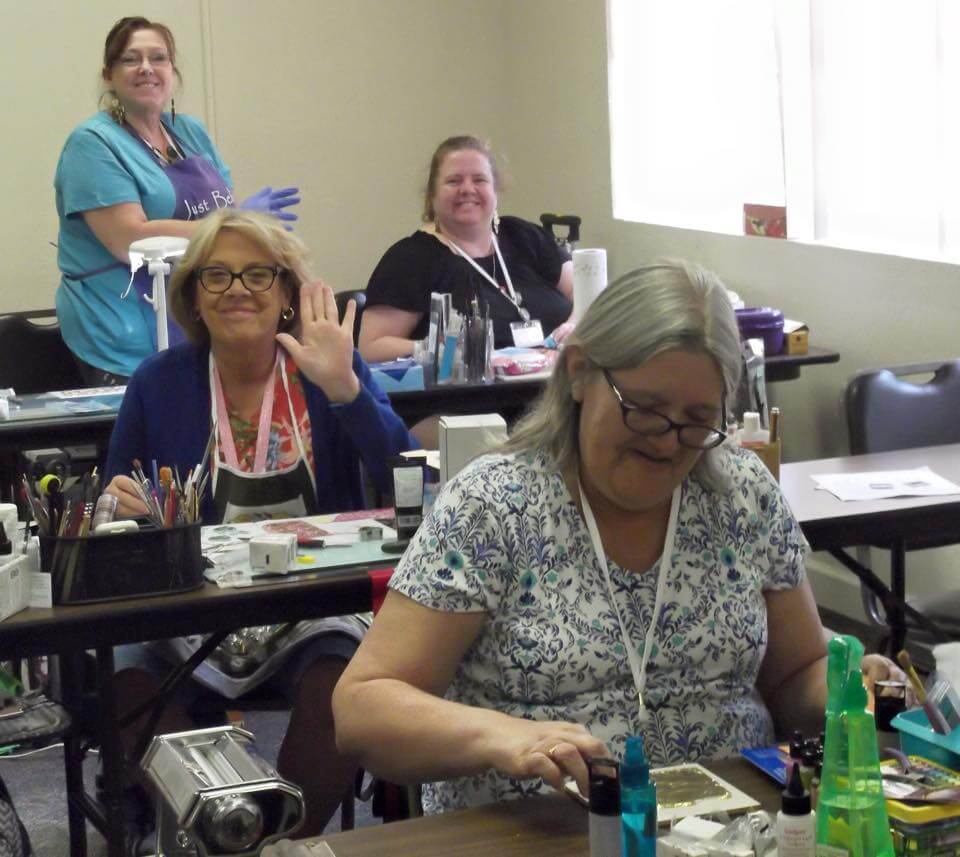
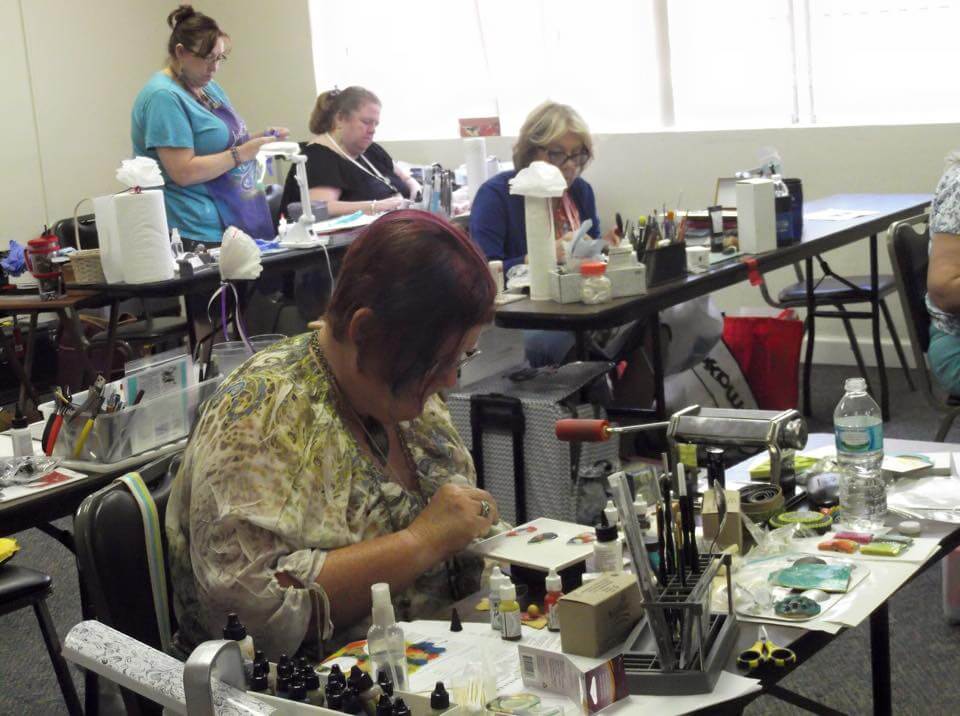
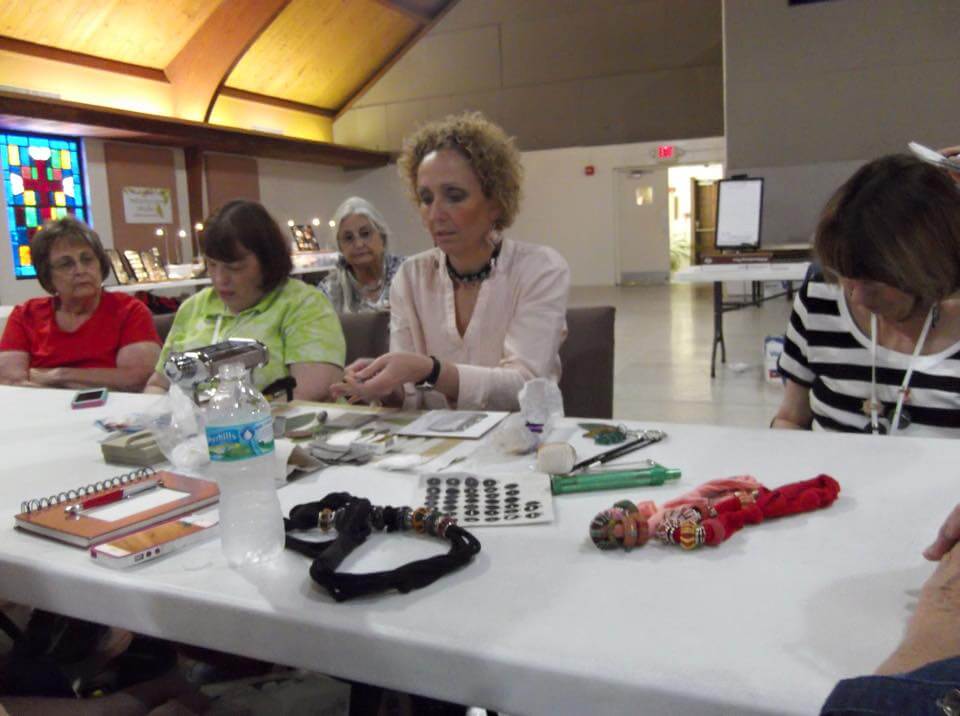
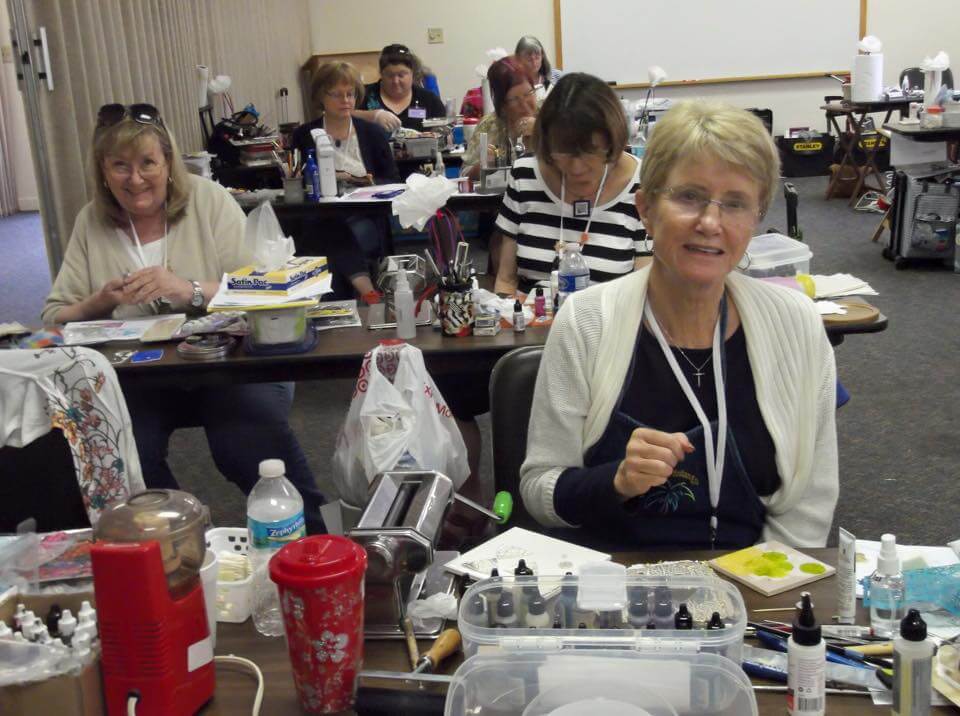
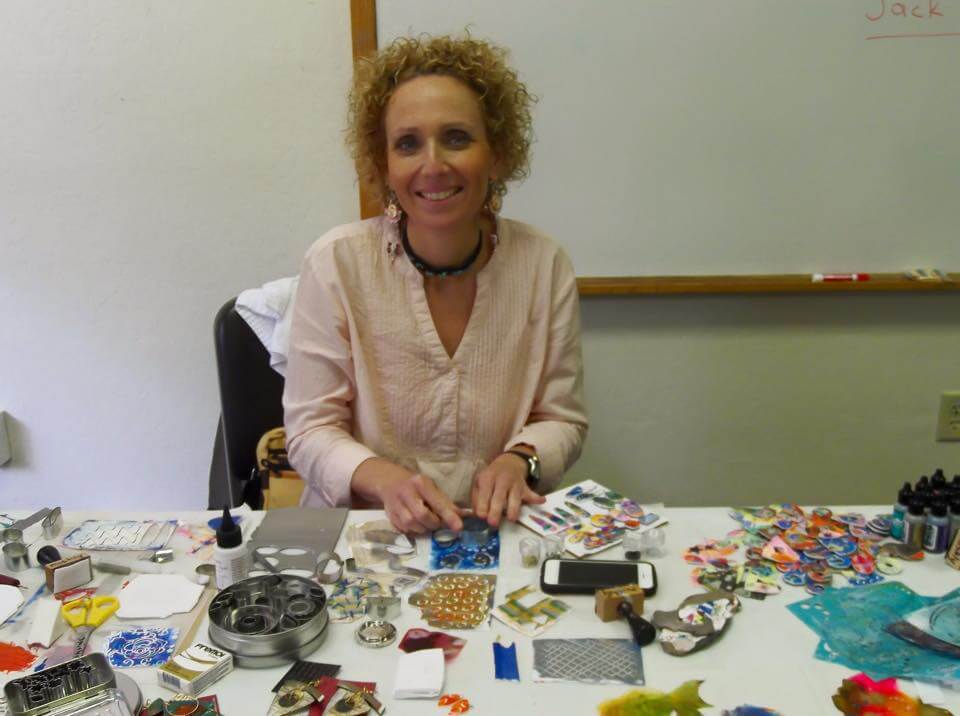
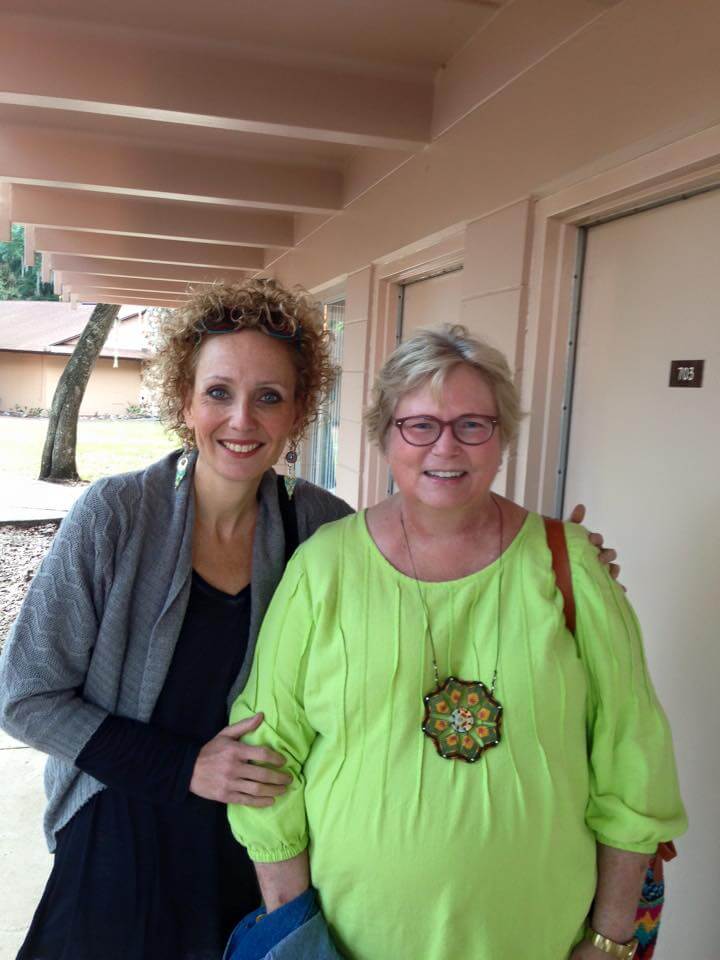
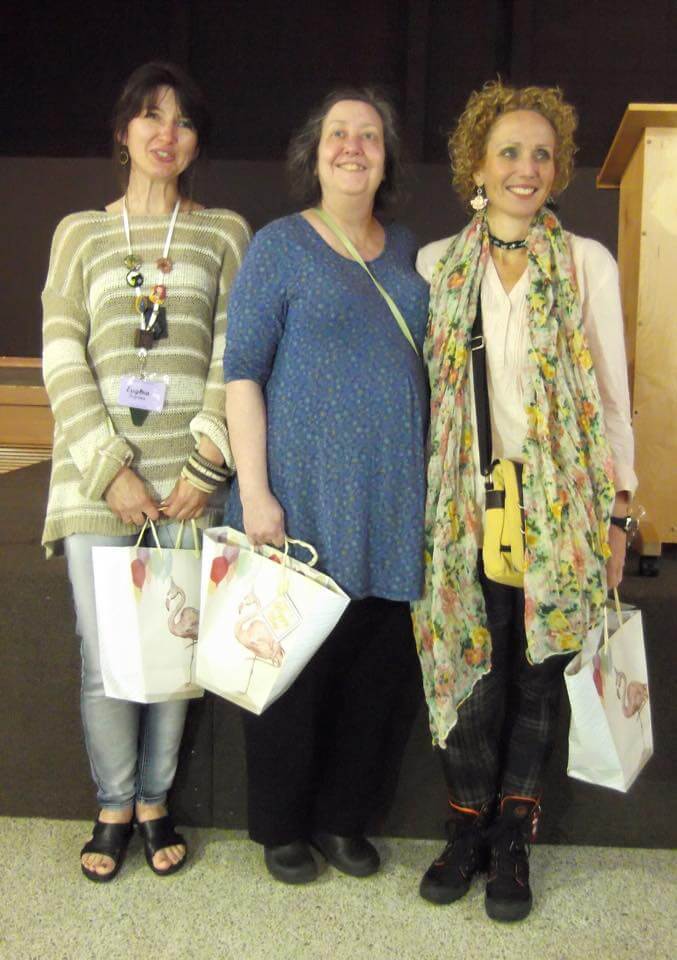
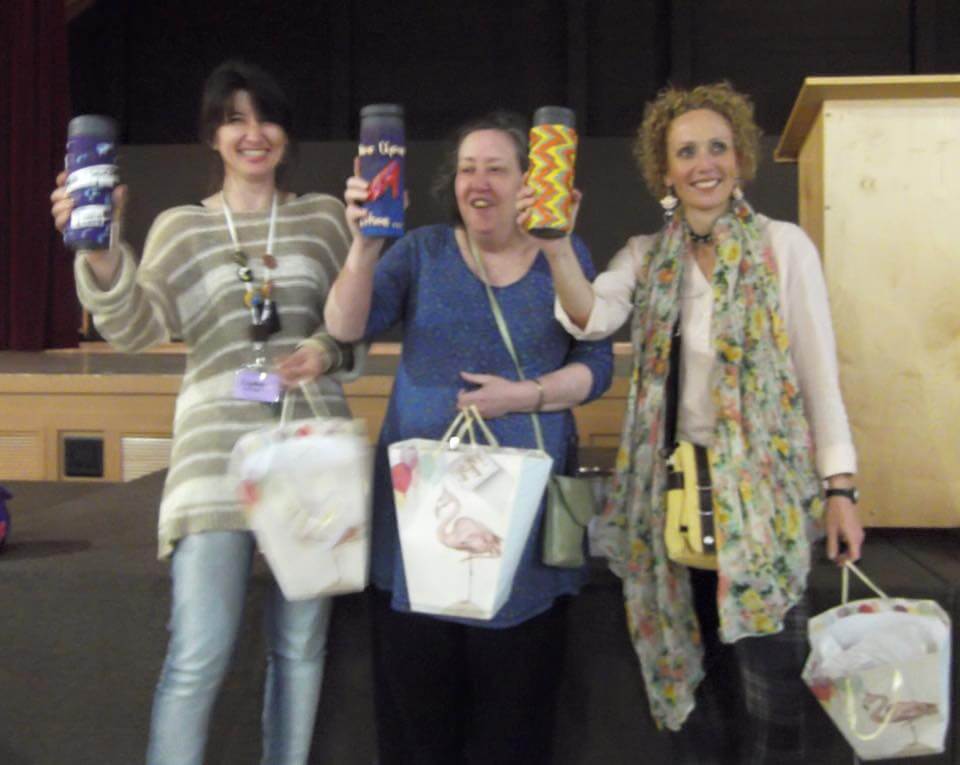
I had the honour of being one of the instructors in this year Orlando Fandango 2015 – Polymer Clay Retreat hosted in Lake Yale Baptist Conference center in Leesburg, Florida.
Although I’m still in my jet-lag phase, I wanted to share some of the photos of this wonderful event.
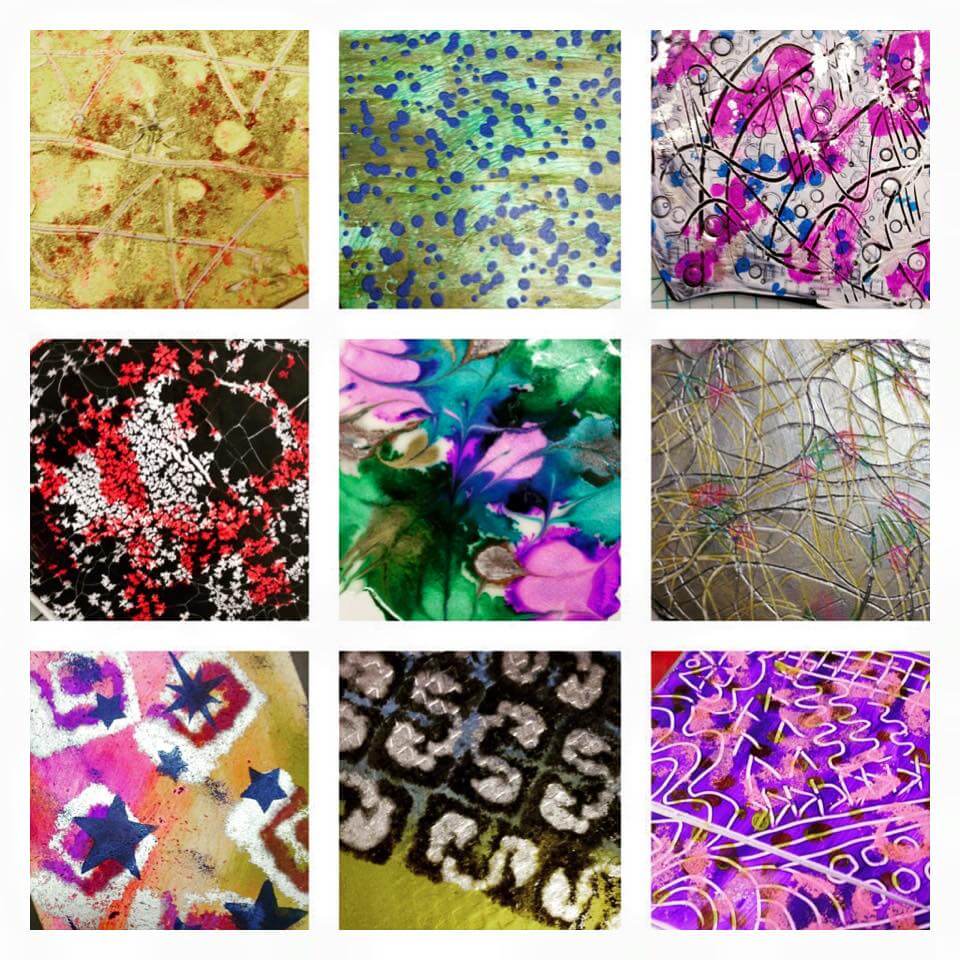
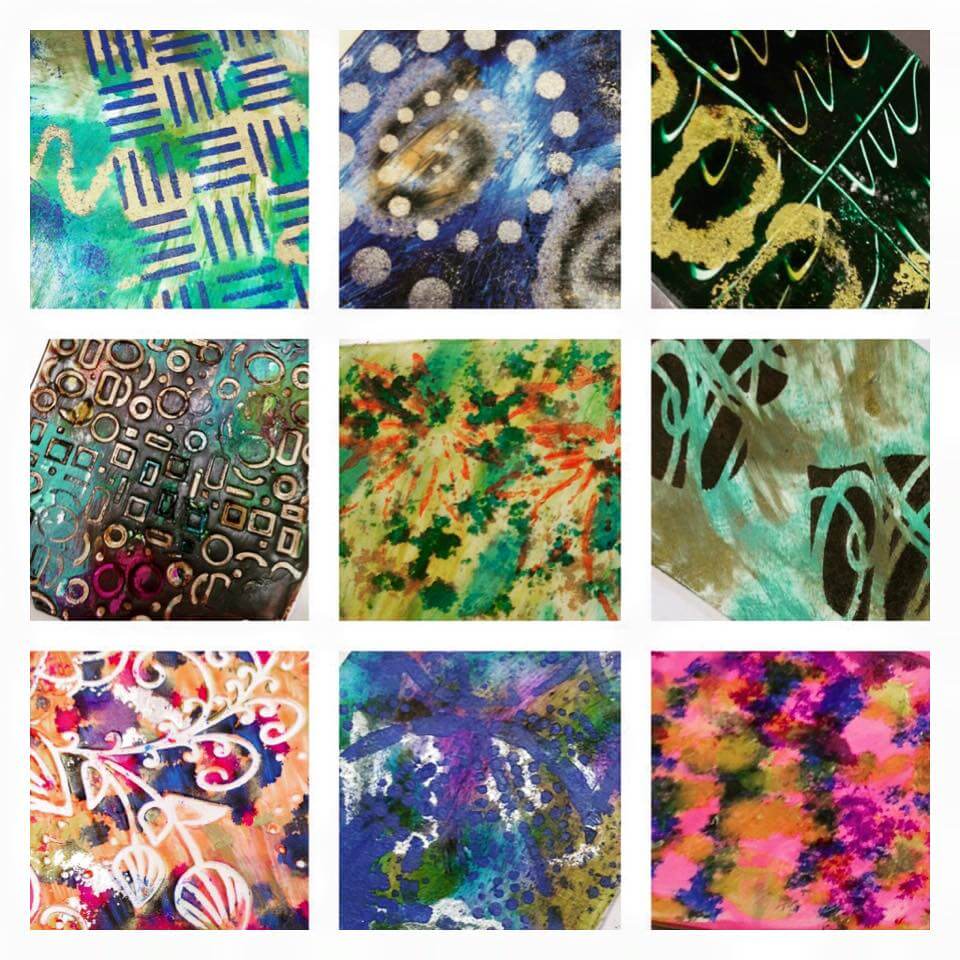
My INKredible class was chosen by last year 2014 Fandango participants as one of the 3 classes to be taught in 2015. When I was notified about my selection I quickly sat down and started thinking of new ways to use alcohol inks with polymer clay in all it’s 3 forms – cured, un-cured and liquid.
Many of the students already purchased my INKredible online class, so I wanted to bring a new angle to this amazing material, challenging myself and my students, experimenting with new surface techniques.
Like you, there are many materials we know now, that I didn’t know a while ago, back when I published my ink class, at 2012. Now, after testing new materials, I could bring my “old” knowledge into a new field and it was an inspirational experience, pure joy!
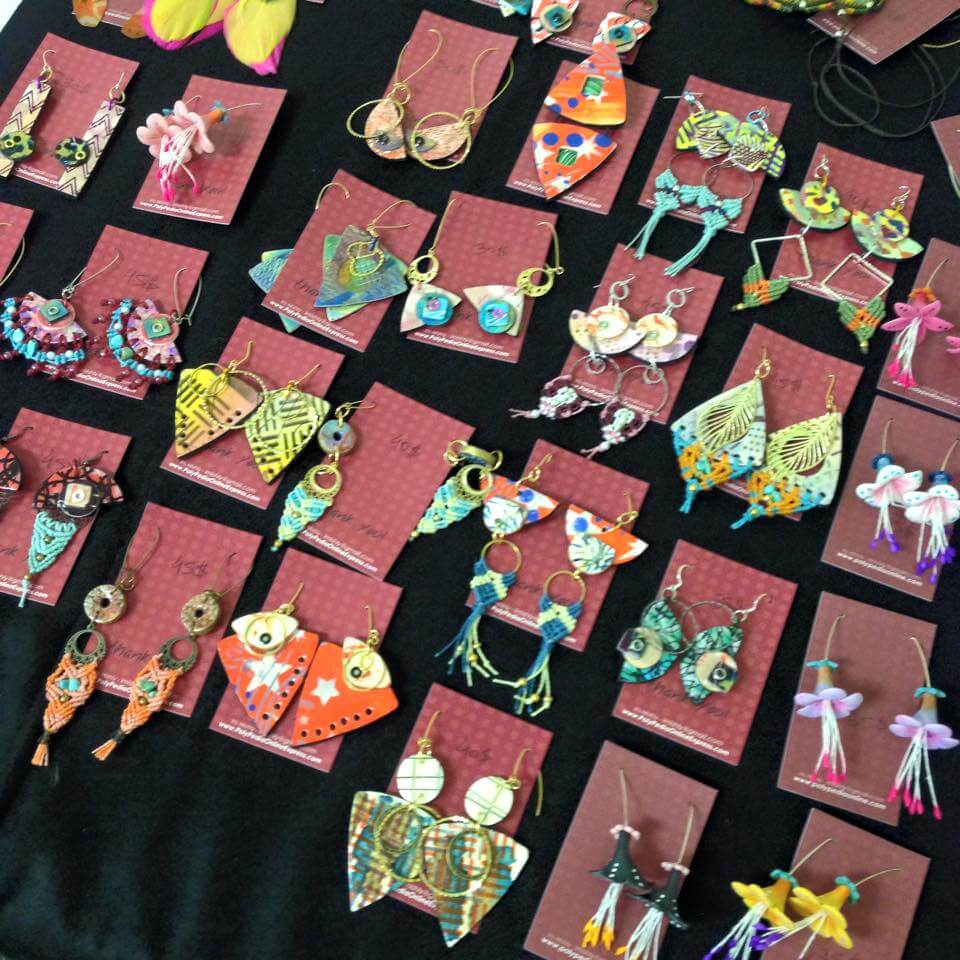
You probably saw my earrings post published several weeks ago, all my endless experiments were translated into small earring sample (to save on the suitcase weight!) and each showed a new surface design using known materials in different, new ways.
I am happy to say that the feedback from the students was heart warming. Each had her own interpretation of the technique – colours, patterns, textures, design – a colourful celebration.
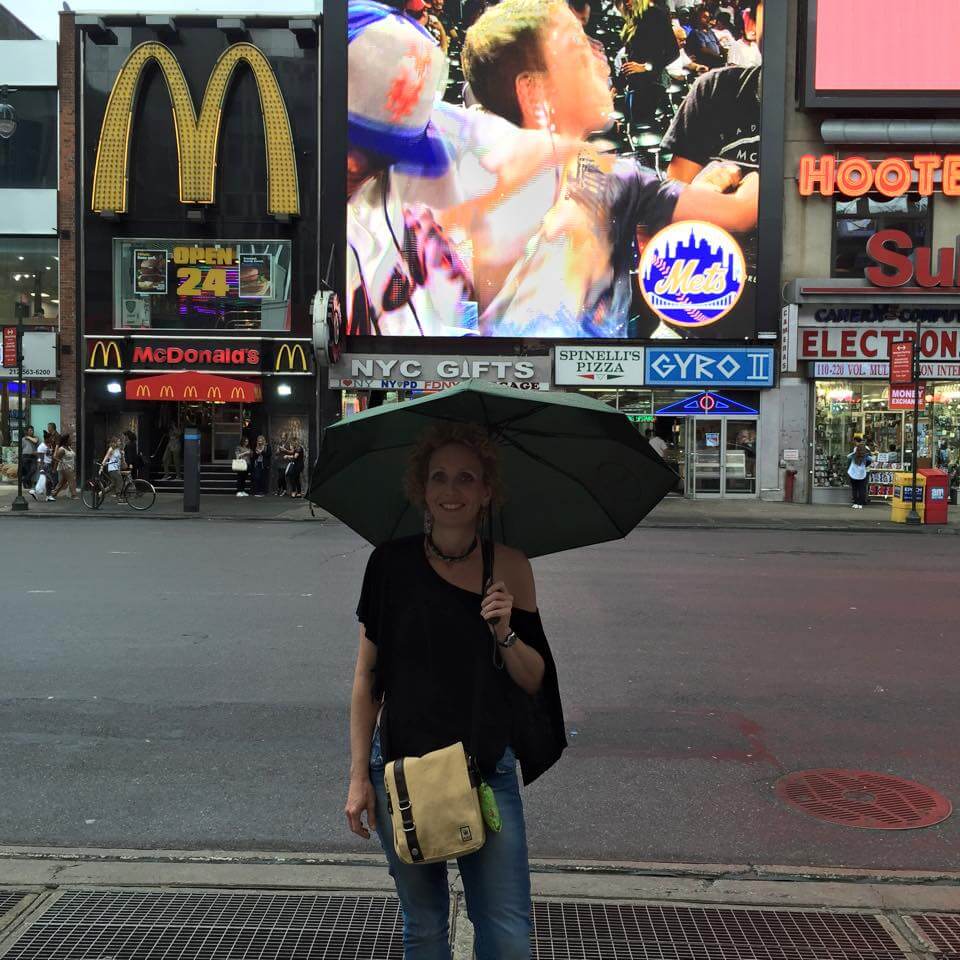
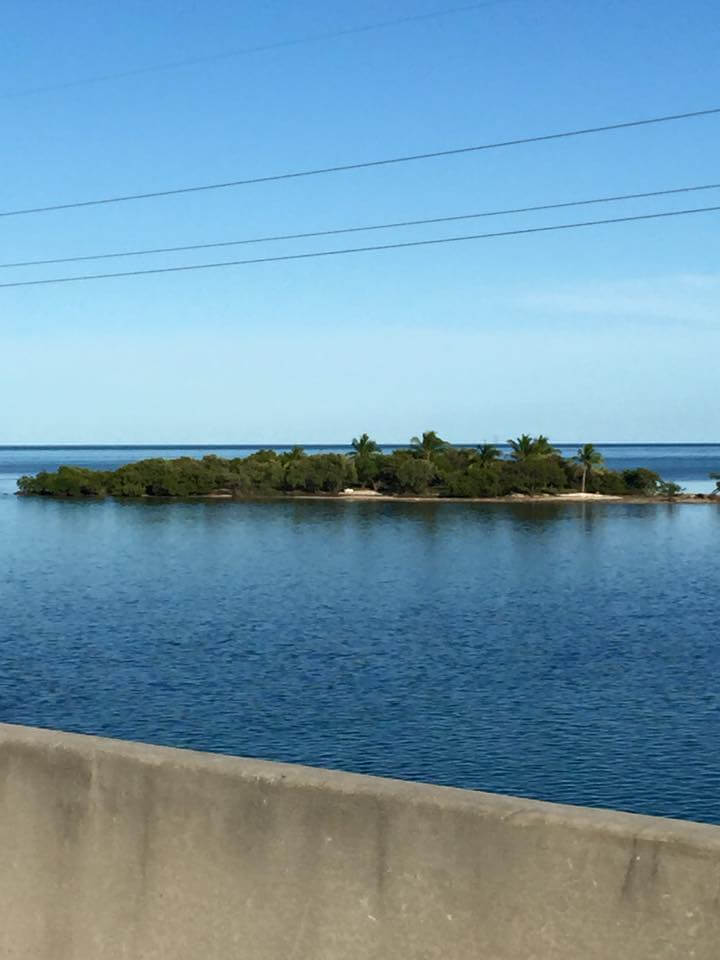
THANK YOUs!I want first to thank the Orlando polymer clay guild for inviting me to this well organized, peaceful colorful event! It was a pleasure! Thank you dear students for choosing me and my class and giving me this wonderful opportunity to visit Florida (this time not on roller coasters!) and touring your large beautiful country! I had my other half joining me to a great vacation at the keys and NYC! Thank you Polyform for your generous donation of clay, textures, liquid clay, gloss, findings and so much more! You spoiled us well! Thank you Eugena Topina and Lindly Haunani, my colleague instructors for the lovely company and smiles :)
I hope to meet you all again!
#gallery-3 { margin: auto; } #gallery-3 .gallery-item { float: left; margin-top: 10px; text-align: center; width: 33%; } #gallery-3 img { border: 2px solid #cfcfcf; } #gallery-3 .gallery-caption { margin-left: 0; } /* see gallery_shortcode() in wp-includes/media.php */ Goodie Bag! The beautiful Baptist conference center, Leesburg, Florida The beautiful Baptist conference center, Leesburg, Florida The beautiful Baptist conference center, Leesburg, Florida The beautiful Baptist conference center, Leesburg, Florida The beautiful Baptist conference center, Leesburg, Florida The beautiful Baptist conference center, Leesburg, Florida Nita is handling the ovens! Captain heat! Students in class Students in class Demoing… Students in class Students in class Students in class Students in class Students in class Demoing Extruder secrets… Students in class Crazy Nancy Terry with her new necklace Students work Students work Students work Students work Earrings class samples Along with Eugena and Lindly Raising our gifts! Tea mugs Students work Students work Students work On my way to Key West On my way to Key West Everglades NYV NYC NYC Key West With my sweet other half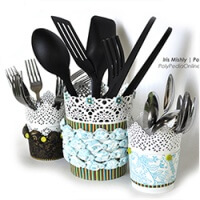
New FREE polymer clay tutorial – “Billowed-Screened” technique project! ~~~~~~~~~~~~~~~~~~~~~~~~~~~~~~~~~~~ As a part of Polyform company contributing online artists team, I was requested to share a fun technique to be published online. The only request was: “Please use Sculpey III clay.”
Being a newbie with this brand of clay (never touched it before) I immediately started playing with it, checking its characteristics.
Silk screens are also new to me. Ever since I got my sample kit from Polyform my fingers were tickling to try them out.
After several tries, a new project was born combining both – silk screens are Sculpey III clay. A decorative utensil holder.
This project can be adapted into endless other uses – other holders (studio tools, makeup brushes) or even large statement jewelry such as bracelets!
Click here to follow the tutorial on Sculpey.com page – https://www.sculpey.com/project/sculpey-iii-billowing-technique-utensil-holders-2/ Greece teaching – October 2015 ~~~~~~~~~~~~~~~~~~~~~~~~~~~~~~~~~~~
I am happy to offer 2 half days classes in the polymer clay retreat “Meraki in Mani”, taking place in Stoupa, Greece, organized by Ms. Lee O’Connor.
The five day retreat will take place on October 5-9, 2015.
The aim of this retreat is working together doing what we all love, sharing knowledge, techniques and inspiration and having some new material and tools to try out as well as having time off to explore and enjoy the area.
I will be giving 2 half day workshops on Tuesday– Wednesday, October 6-7th ,2015 – The “Cosmic Ceramic” faux ceramics technique & “The Brocade Collection” purses class.
All the details about my workshops can be found in the following link – https://www.polypediaonlineexpress.com/polymer-clay-retreat-greece-october-2015-iris-mishly-workshops/ → Click here to read more
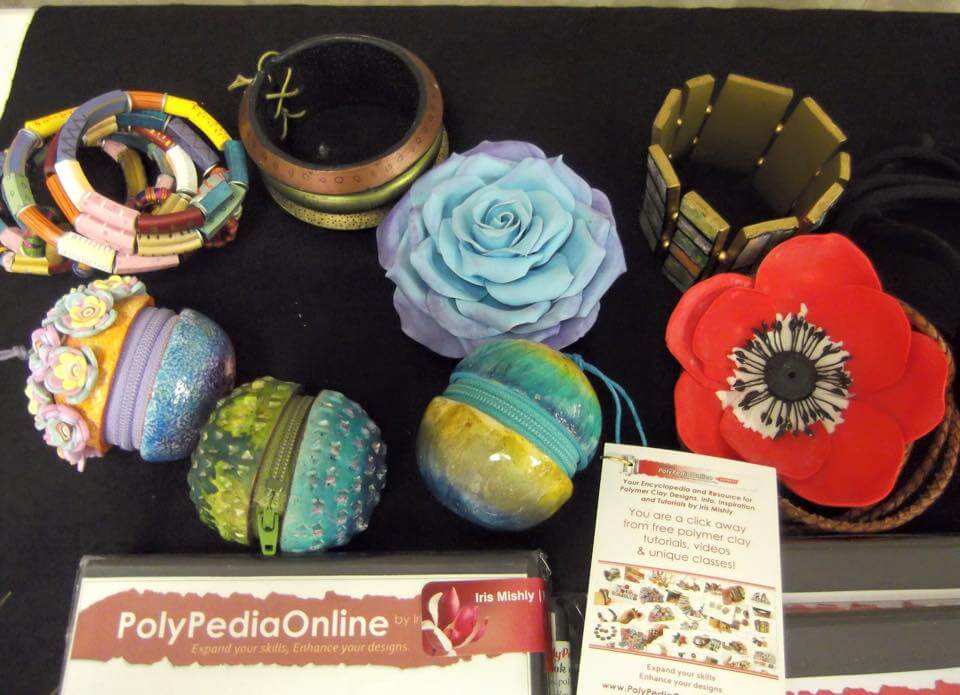
Beads! Beads are with us from the beginning of time. Since our prehistoric ancestors decorated themselves with bones and teeth, we all love to embellish ourselves with jewellery.
Large or small, narrow or wide, sparkling or organic, colourful or monochrome – almost every woman likes to wear jewellery.
If you love wearing, creating or would be interested in selling your polymer clay beads and jewellery, this master-class tutorial is definetly for you!
This special sale is gathering PolyPediaOnline Express beads tutorials in a single product!
What is included in this beads master-class?
All techniques – Extruder, faux techniques, liquid polymer clay, millefiori canes, mix media, flowers, sculpturing, folding and rolling.
Some tutorials include much more than a single bead tutorial – necklaces, bracelets, charms, brooches, etc!
28 PROJECTS –
► Cosmic Ceramic Polymer Clay Tutorial – Faux Ceramic Foliage Beads (eBook+Video)
► Cosmic Ceramic Polymer Clay Tutorial – Faux Ceramic Aponi Beads Bracelet (eBook+Video)
► Cosmic Ceramic Polymer Clay Tutorial – Faux Ceramic FireWorks Beads (eBook+Video)
► Cosmic Ceramic Polymer Clay Tutorial – Faux Ceramic Moon Rocks Beads (eBook+Video)
► Cosmic Ceramic Polymer Clay Tutorial – Faux Ceramic Riomaggiore Mini-Houses Beads (eBook+Video)
► Cosmic Ceramic Polymer Clay Tutorial – Faux Ceramic Round About Beads, Ceramic Blossom & Let The Thousand Flowers Beads (eBook+Videos)
► Cosmic Ceramic Polymer Clay Tutorial – Faux Ceramic Top Gear Beads (eBook+Video)
► Extrudinary Life Savers & Curly Beads Tutorial (eBook+Video)
► Extrudinary Polymer Clay Canoe Necklace & Beads (eBook+Video)
► Extrudinary Polymer Clay MilleFIORI Extruding (eBook+Video)
► Extrudinary Polymer Clay X Mix Drix Tile Bracelets & Pendant (eBook+Video)
► Flakes Technique – Polymer Clay Beads Tutorial (eBook+Video)
► INKredible Alcohol Inks Polymer Clay Tutorial – Flower Power Pendants (eBook+Video)
► Polymer Clay “Tile-Pastel” Necklace Beads Tutorial (eBook)
► Polymer Clay Beach Ball Beads/Charms Tutorial (eBook)
► Polymer Clay Carving 101- Beads Tutorial (eBook)
► Polymer Clay Flip Flops Beads/Charms Tutorial (eBook)
► Polymer Clay Heart Pillow Beads Tutorial (eBook)
► Polymer Clay Make Your Molds – Puffy Beads Tutorial (eBook)
► Polymer Clay Millefiori Buttons, Paper Clip Bookmarks Tutorial (eBook)
► Polymer Clay Millefiori Divided Beads Tutorial (eBook)
► Polymer Clay Millefiori Fun Bugs Tutorial (eBook)
► Polymer Clay Mosquito Technique Tutorial – Beads & Necklace (eBook)
► Polymer Clay Mosquito Technique Tutorial – Geometric Necklace (eBook)
► Polymer Clay Mosquito Technique Tutorial – High-Tech Pixel Frame Brooch (eBook+Video)
► Polymer Clay Mosquito Technique Tutorial – Mystifying Floral Brooch (eBook)
► Polymer Clay Popsicle Beads, Charms, Bracelet Tutorial (eBook)
► SkyScraper Technique – Polymer Clay Bracelet, Beads, Brooch Tutorial (eBook+Videos)
TOTAL VALUE – $678
NOW OFFERED FOR A DISCOUNTED PRICE – $400
28 tutorials for 400$ – that’s only 14.2$ per tutorial!
Included – 28 PDF files containing hundreds of step-by-step pages PLUS online access to password protected videos demonstrating the process of creating the products (when video is available).
Pre-requisites – Some previous experience with polymer clay is helpful.
Tutorial Level – Beginner and above.
When purchasing PolyPediaOnline Express tutorial you will get unlimited access to the tutorial video/s. There is no limitation on the number of times you can watch the videos, but you can not download it to your hard drive. These videos are password protected and passwords will be sent to you by email along with the PDF files after completing your purchase.
All projects includes my special benefit of 100% online support.
You can contact me with any question you have and I will assist you in any way I can.
If you wish to purchase this tutorial, please scroll up, press on “Add to Cart” Button and proceed to checkout.
Please note – all rights reserved to Iris Mishly. It is prohibited to make commercial use of the tutorial and/or it’s content. This Tutorial is for your personal use only – Please do not distribute or share it in any way.Have a creative day! :)


